
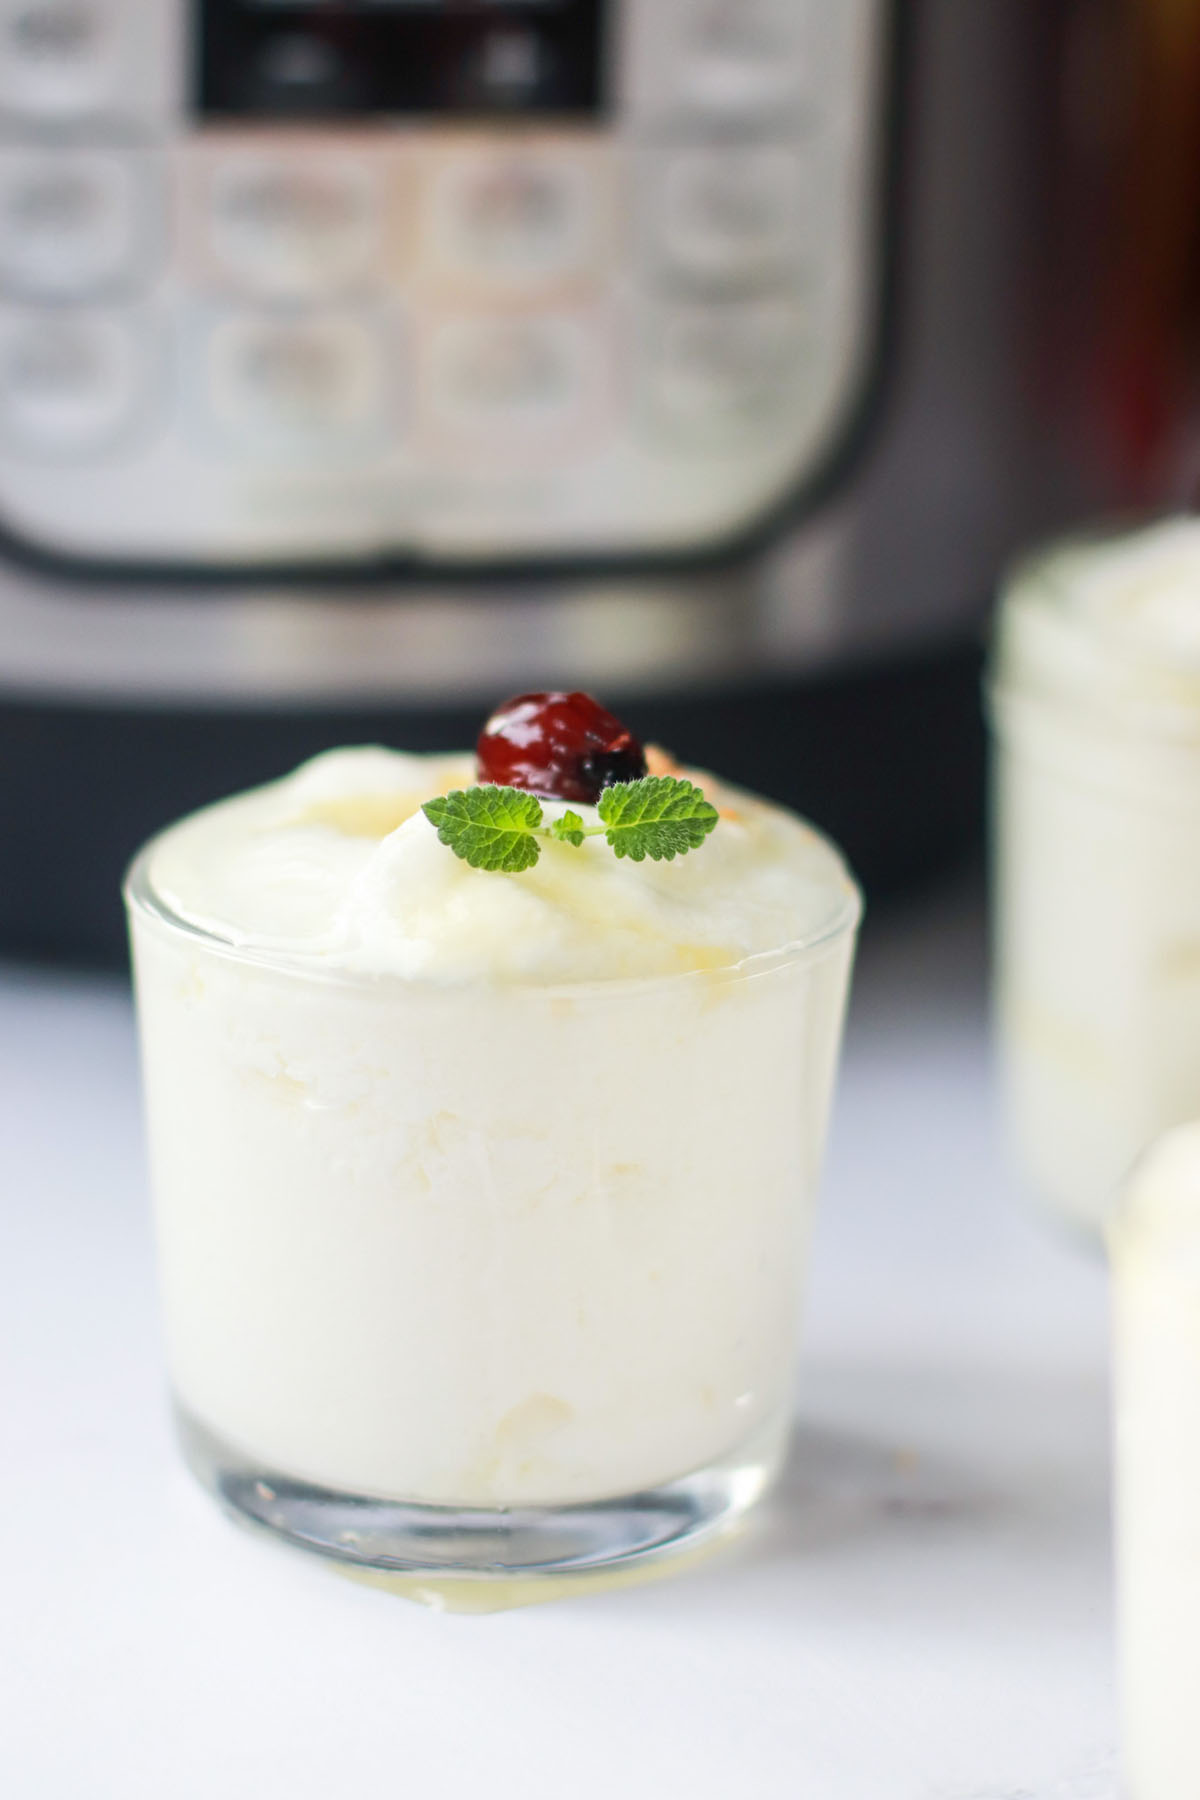
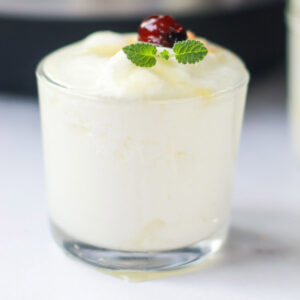
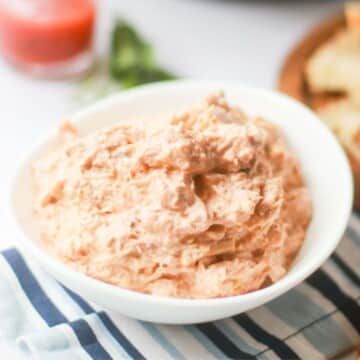
This Instant Pot Yogurt Cold Start recipe transforms ultra-pasteurized milk and a Greek yogurt starter into rich and irresistibly creamy homemade yogurt with the option for a fun flavor. It’s perfect with healthy toppings, in smoothies and smoothie bowls, and in recipes that call for yogurt, mayo, or sour cream.
Jump to:
Check out my Healthier Banana Cream Pie and my Low Calorie Biscuits for more delicious yogurt recipes!
If you’re a yogurt lover and haven’t made cold start yogurt in your Instant Pot, what are you waiting for? This underrated Instant Pot function is a great way to make a big batch of delicious homemade yogurt at a fraction of the store bought cost.
Cold Start Vs. The Traditional Method
Making cold-start yogurt in the Instant Pot is one of the easiest things I’ve ever used it for. It’s as simple as dumping in 3 ingredients and pushing a button - but before we get it going, it’s essential to understand the difference between the cold start and traditional yogurt making methods.
In short, the cold start method ONLY applies to ultra-pasteurized milk. Since it’s ultra-pasteurized, you can bypass boiling the milk to remove any bacteria that standard pasteurization may have left behind.
I buy ultra-pasteurized milk specifically for this Instant Pot cold-start yogurt, but if you have regular pasteurized milk, no worries. In this post, I’ll walk you through both methods and hopefully answer any questions that come up along the way. Let’s get started!
Why You'll Love This Recipe
- It makes a large quantity at a more cost-effective price point than buying Greek yogurt from the store.
- You can make plain yogurt and your favorite flavors.
- If stored properly, homemade yogurt keeps for weeks in the fridge.
- It’s versatile and valuable in many different ways. In parfaits, smoothies, and even savory dishes.
- Yogurt is a good source of protein, vitamins, and minerals.
Ingredients You'll Need
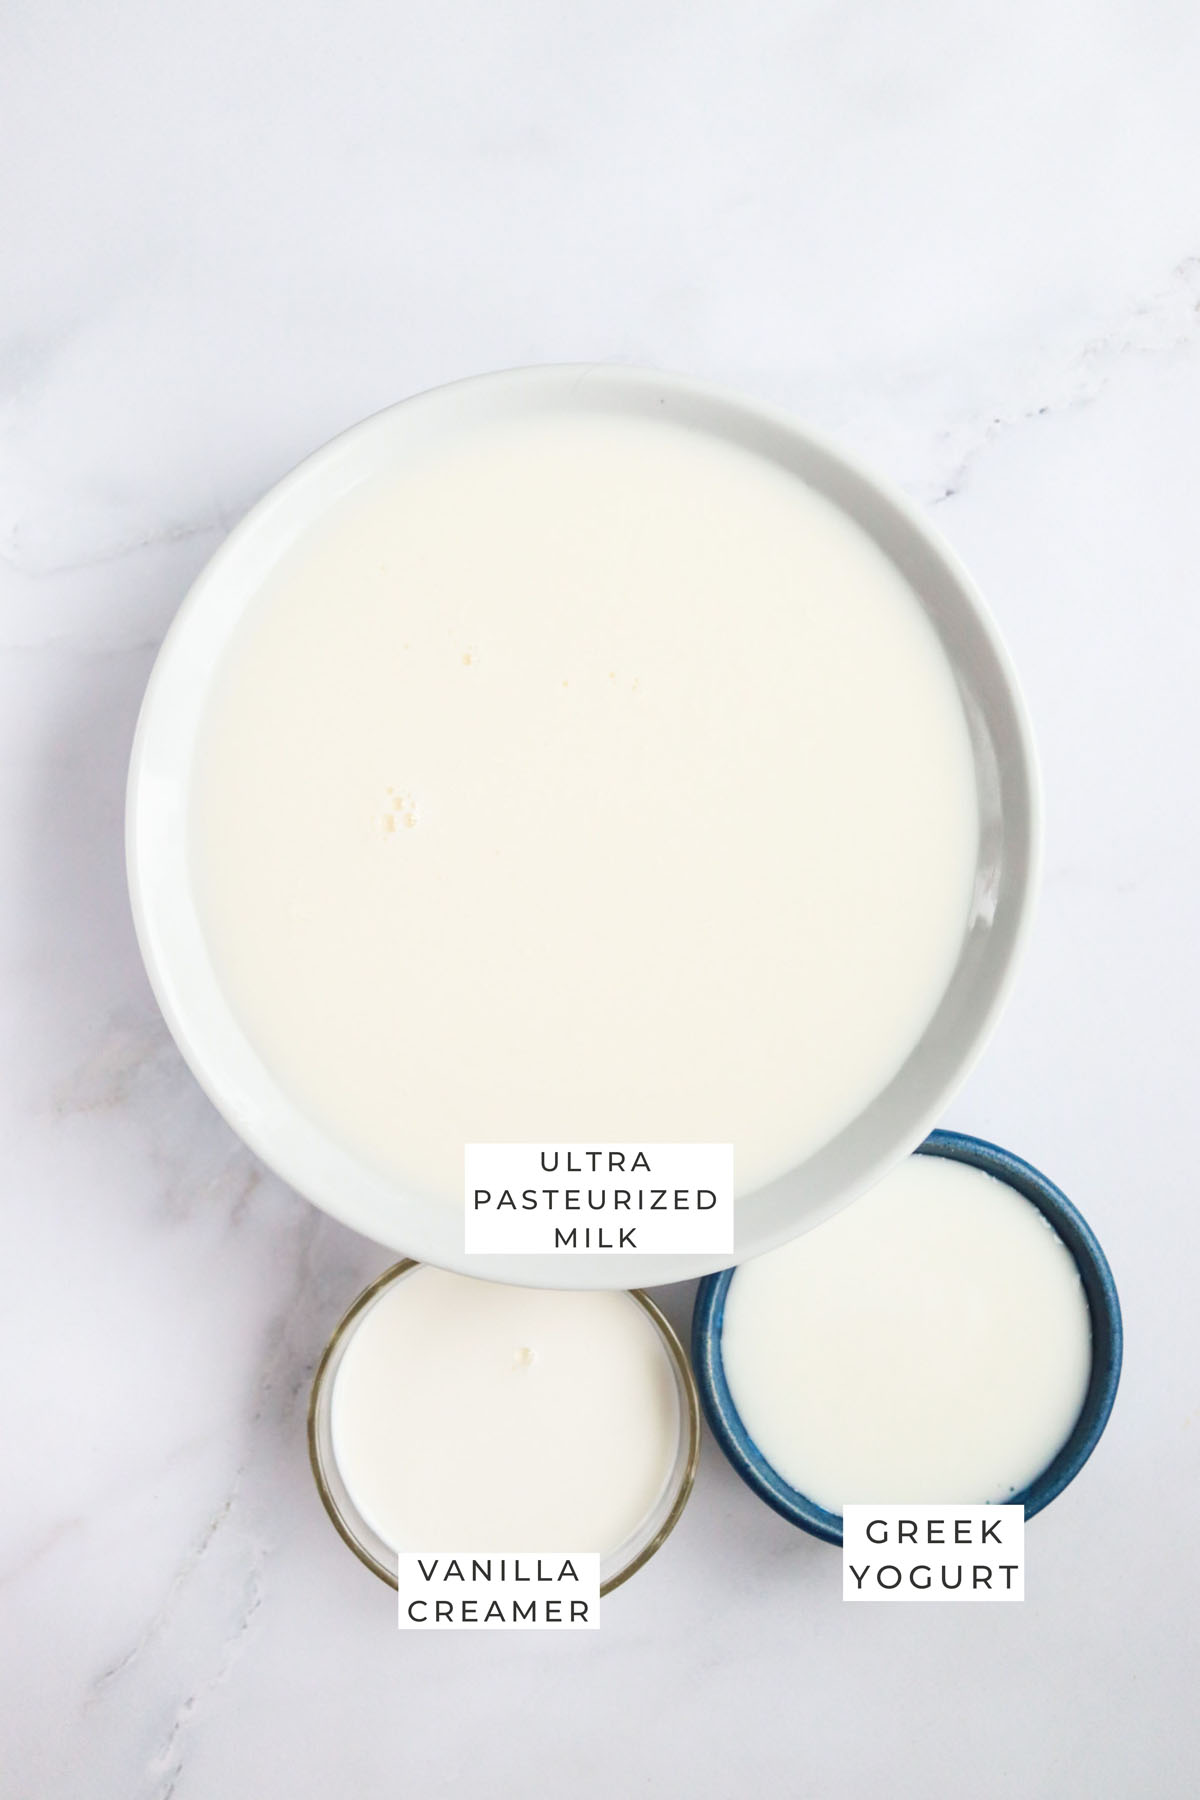
- Ultra-Pasteurized Milk: Fairlife ultra-filtered whole milk is a good option here as it’s already been boiled and is perfectly safe for the cold start method. Again, if you cannot find ultra-pasteurized milk, you can use any type of dairy milk, but it must be boiled to remove lingering bacteria before you can use it to make yogurt.
- Fage 2% Plain Greek Yogurt: The reason you need a small amount of yogurt to make yogurt for the live activated cultures. It’s the starter for a brand-new batch of yogurt.
- Optional Flavored Creamer: I love vanilla yogurt, so I use Coffee-Mate Natural Bliss Vanilla Creamer. Feel free to use a different flavor, or omit it entirely if you prefer plain yogurt.
How To Make Cold Start Yogurt In The Instant Pot
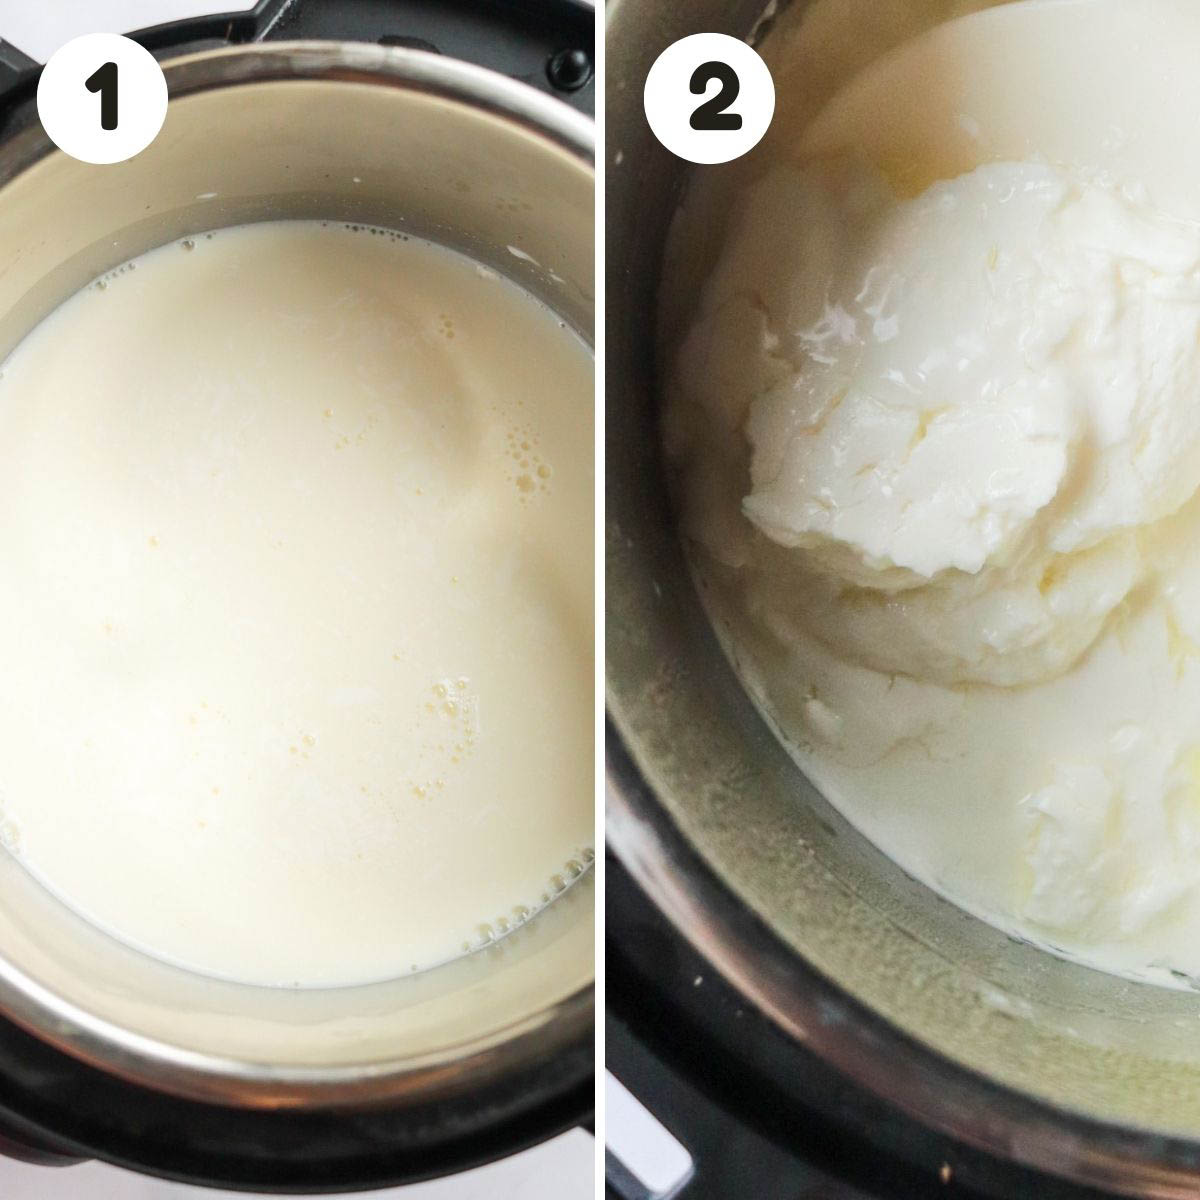
Step 1: Combine cold milk and starter. Add ultra-filtered milk and creamer (if using) to the Instant Pot and mix to combine. Add the Greek yogurt starter and whisk until smooth.
Step 2: Incubate in Instant Pot. Lock the lid in place, leaving the steam valve open. Press the yogurt button and let the Instant Pot work its magic. It will take about 8 hours to finish incubating.
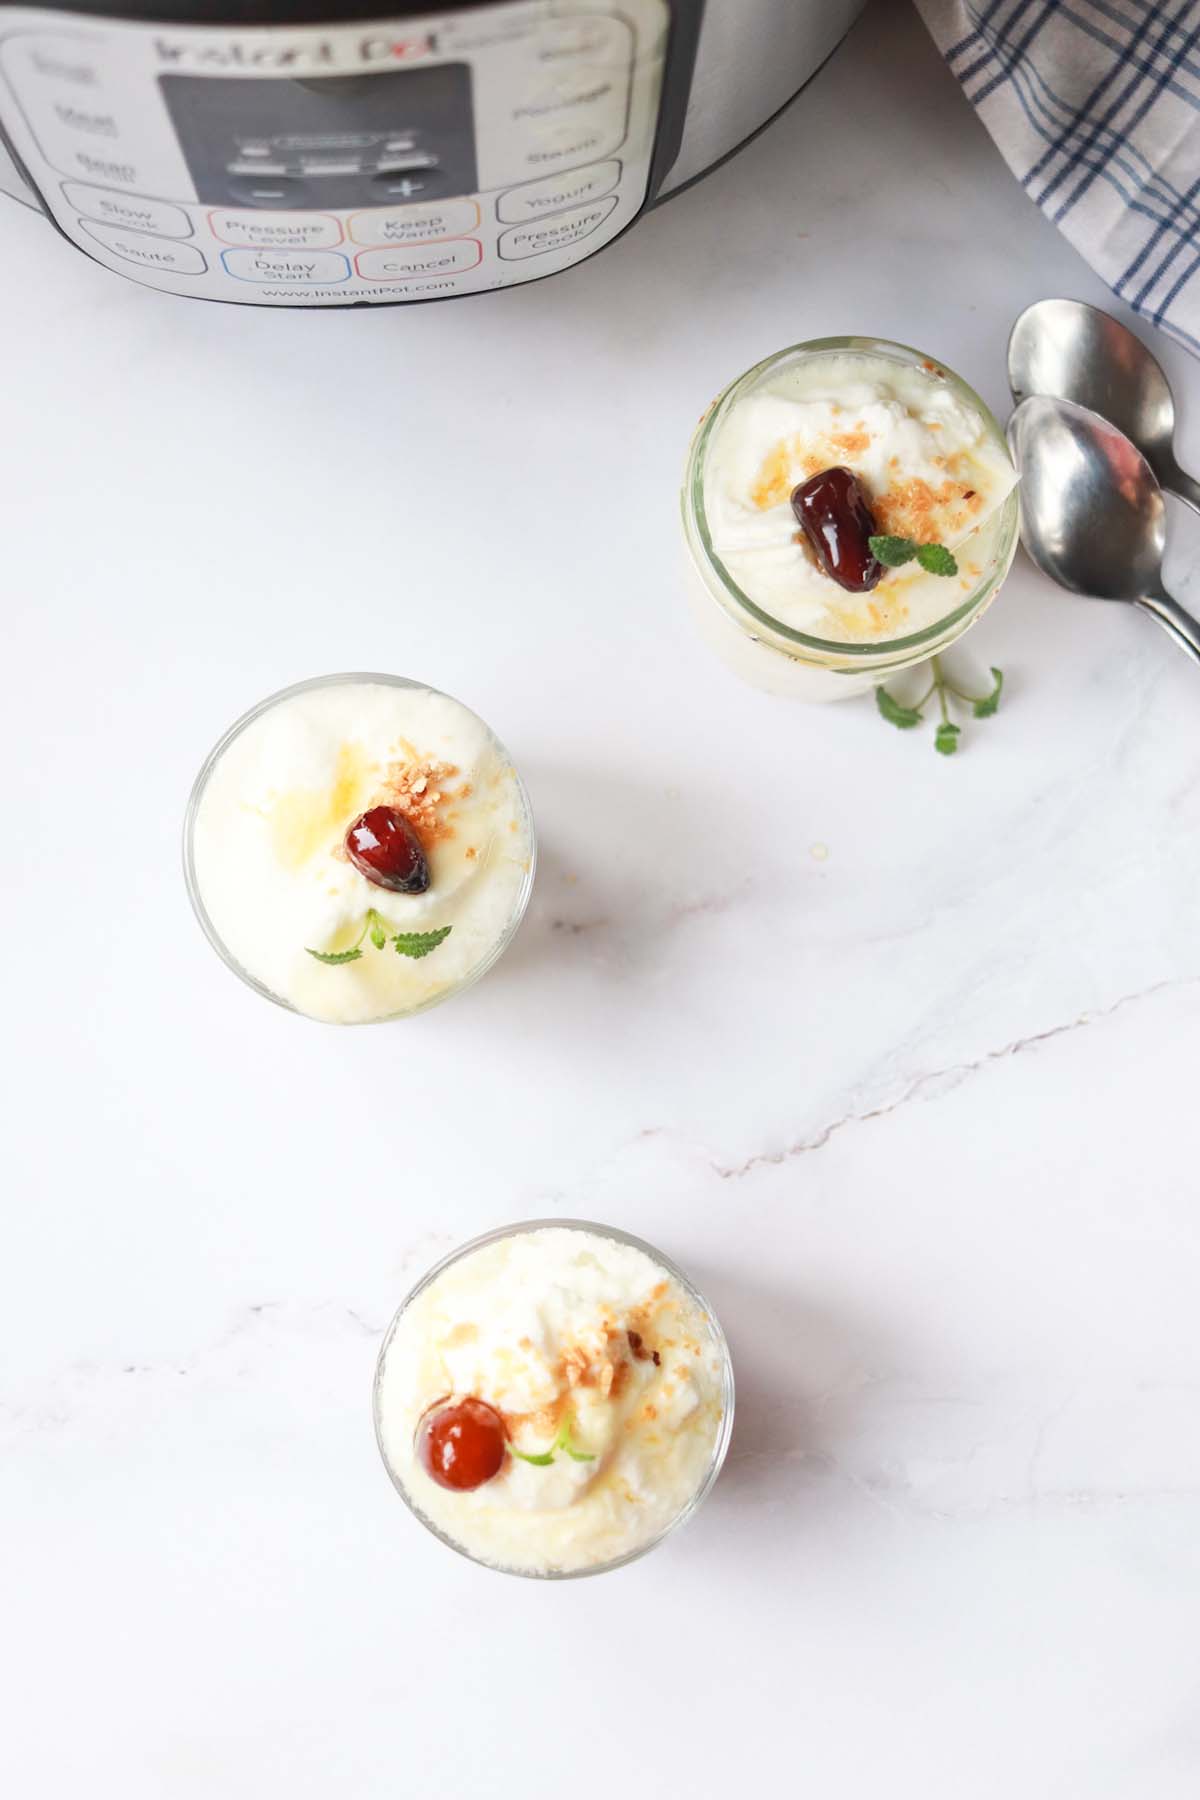
Step 3: Cool in the fridge. Once it’s done, remove the pot insert, cover it loosely with plastic, and then set it in the refrigerator for about 4 hours.
How To Make Traditional Yogurt In The Instant Pot
If you don’t have ultra-pasteurized milk, you can use any milk. However, you’ll have to use the traditional boiling method before it’s ready to incubate in the Instant Pot. Follow these steps:
Step 1: Boil milk. Pour the milk into a large, heavy-bottomed pot, and heat over medium-high heat until the milk reaches 180 °F. Lower the heat just enough to hold the temperature at 180 °F and simmer for about 30 minutes.
Step 2: Shock milk. When the milk is almost finished, prepare an ice bath large enough for the pot. Then, submerge the pot into the ice bath to quickly cool the milk down to 115 °F. Now it’s ready for the Instant Pot (follow the instructions above).
NOTE: You can print the FULL recipe with all ingredients & detailed instructions below!
Expert Tips
- Do not stir the yogurt while it’s in the Instant Pot. For the best results, leaving it be for the entirety of the incubation period is key.
- For an even thicker consistency, you can strain the yogurt through cheesecloth once it’s finished.
- This recipe won’t work using any Greek yogurt. It must have live active yogurt cultures to work as a starter culture for a fresh batch of yogurt.
Serving
As for ways to use your homemade yogurt, the options are endless. It’s the perfect consistency for making an low calorie açaí bowl or Greek yogurt parfait with homemade granola with toppings like fresh fruit, nuts, seeds, granola, and more. You can also add it to smoothies like my coconut berry smoothie or real fruit smoothie.
You can use this yogurt if you stumble upon mayo or sour cream in many recipes. Though, you may want to use plain yogurt in that case. You can also use it to make:
Storing & Freezing
Storing: After letting the yogurt chill in the fridge for about 4 hours, scoop it into an airtight glass container or portion it into snack-size containers with tight lids. It will keep in the refrigerator for 10-14 days.
Freezing: Likewise, you can freeze it for up to 2 months.
Recipe FAQ's
This recipe yields about sixteen 1-cup servings of yogurt.
I simply combine a flavored creamer like vanilla with milk to make fun yogurt flavors. You can also use a dash or pure flavoring extract like vanilla, lemon, or strawberry. If you’re planning to use some yogurt in savory recipes, it’s probably best to hold off on fruity flavors, but you can always swirl flavor into individual servings. For example, add a spoonful of strawberry jam, lemon curd, or blueberry jelly!
More Easy Instant Pot Recipes


Instant Pot Yogurt Cold Start
Special Equipment
Ingredients
- 52 ounces Fairlife whole ultra-filtered milk
- 16 ounces Coffee-Mate natural bliss vanilla creamer
- 7 ounces Fage 2% plain Greek yogurt
Instructions
- Add ultra-filtered milk and creamer (if using) to the Instant Pot and mix to combine. Add the Greek yogurt starter and whisk until smooth.
- Lock the lid in place, leaving the steam valve open. Press the yogurt button and let the Instant Pot work its magic. It will take about 8 hours to finish incubating.
- Once it’s done, remove the pot insert, cover it loosely with plastic, and then set it in the refrigerator for about 4 hours.
Notes
How to Make Traditional Yogurt In The Instant Pot
If you don’t have ultra-pasteurized milk, you can use any milk. However, you’ll have to use the traditional boiling method before it’s ready to incubate in the Instant Pot. Follow these steps: Step 1: Pour the milk into a large, heavy-bottomed pot, and heat over medium-high heat until the milk reaches 180°F. Lower the heat just enough to hold the temperature at 180°F and simmer for about 30 minutes. Step 2: When the milk is almost finished, prepare an ice bath large enough for the pot. Then, submerge the pot into the ice bath to quickly cool the milk down to 115°F. Now it’s ready for the Instant Pot (follow the instructions above).- Do not stir the yogurt while it’s in the Instant Pot. For the best results, leaving it be for the entirety of the incubation period is key.
- For an even thicker consistency, you can strain the yogurt through cheesecloth once it’s finished.
- This recipe won’t work using any Greek yogurt. It must have live active yogurt cultures to work as a starter culture for a fresh batch of yogurt.
- Storing: After letting the yogurt chill in the fridge for about 4 hours, scoop it into an airtight glass container or portion it into snack-size containers with tight lids. It will keep in the refrigerator for 10-14 days.
- Freezing: Likewise, you can freeze it for up to 2 months.
Nutrition
All nutritional information is based on third-party calculations and should be considered estimates. Actual nutritional content will vary with brands used, measuring methods, portion sizes and more.


Bonita
I have been making my yogurt this way for a number of years. Can you tell me, what woudl be considered “one” serving? Would it be 5 ounces?
Niki
Has anyone ever tried to use different flavored creamer other then vanilla bliss?