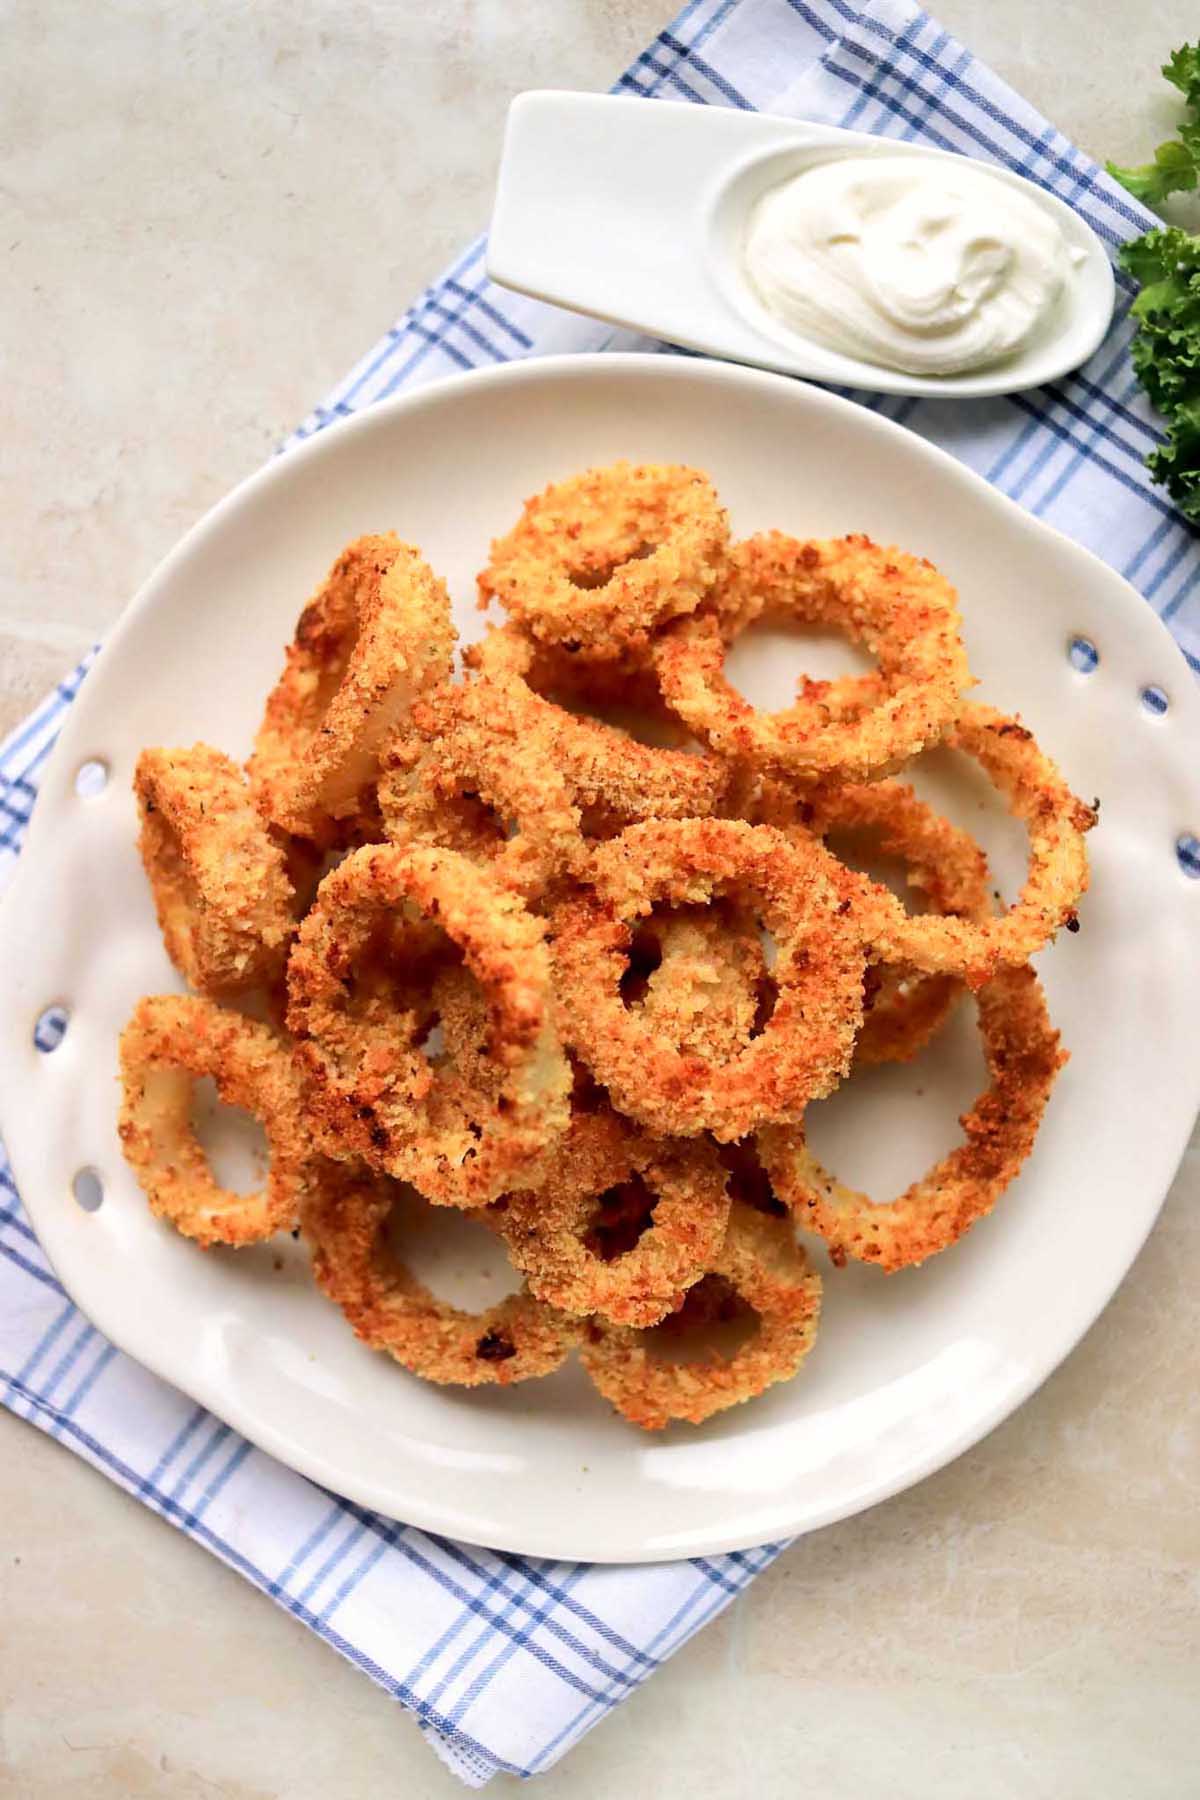
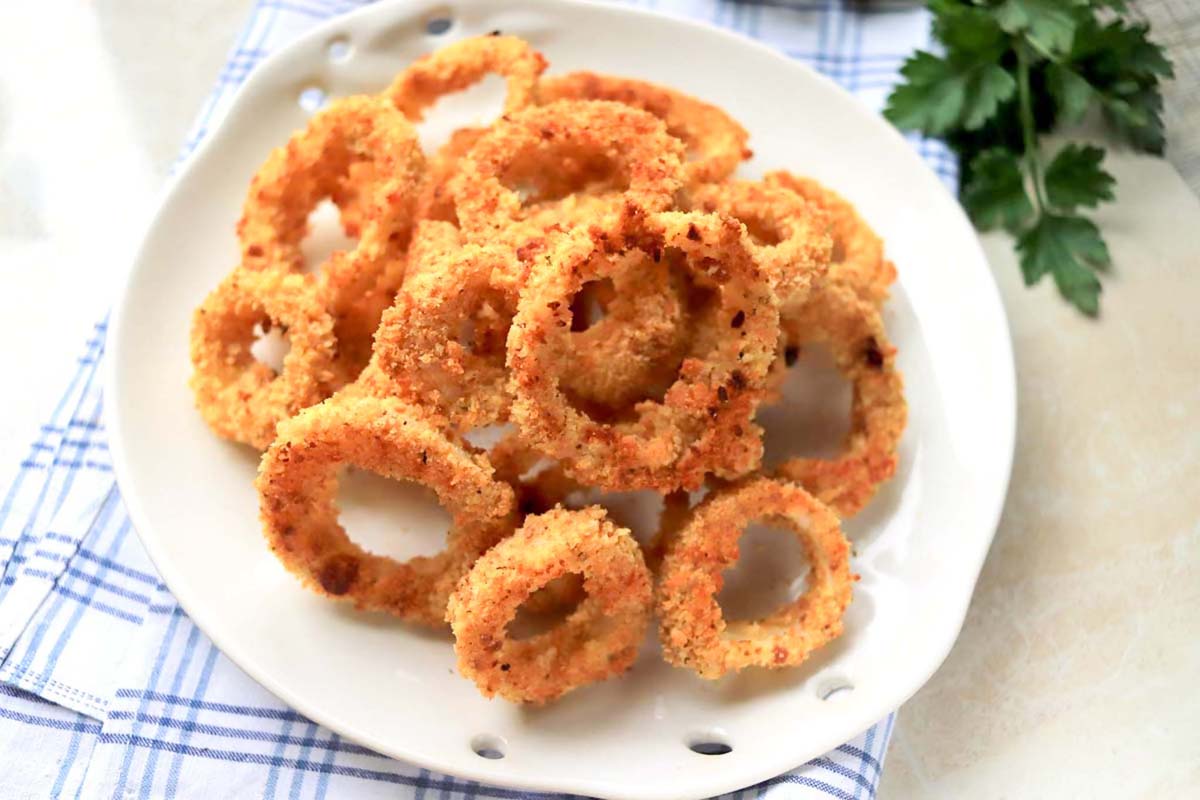
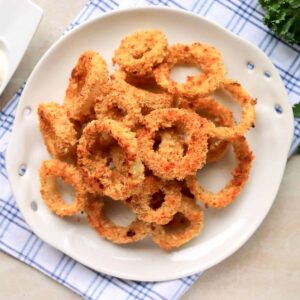
Say no more to greasy traditional onion rings. These Healthy Onion Rings are baked in the oven with less oil, less fat, and less mess. The results are exceptionally crispy and delicious homemade onion rings in under 30 minutes with just 4 ingredients.
Try my Low Calorie Stuffing and my Low Calorie Charro Beans for more delicious side dish recipes!
Jump to:
Baked Onion Rings
This onion ring recipe is quick, easy, and taste like restaurant quality hand breaded fried onion rings. The crispy coating makes these the best, loved onion rings.
You'll love how it's made with simple ingredients and a short cooking time. After slicing, coat the onions in flour, yogurt, and breadcrumbs before baking them in a hot oven.
More low calorie appetizers to try: Air Fryer Mashed Potato Balls
Why You’ll Love This Recipe
This healthier version is the best way to get onion rings full of delicious flavor. It's also the perfect side dish.
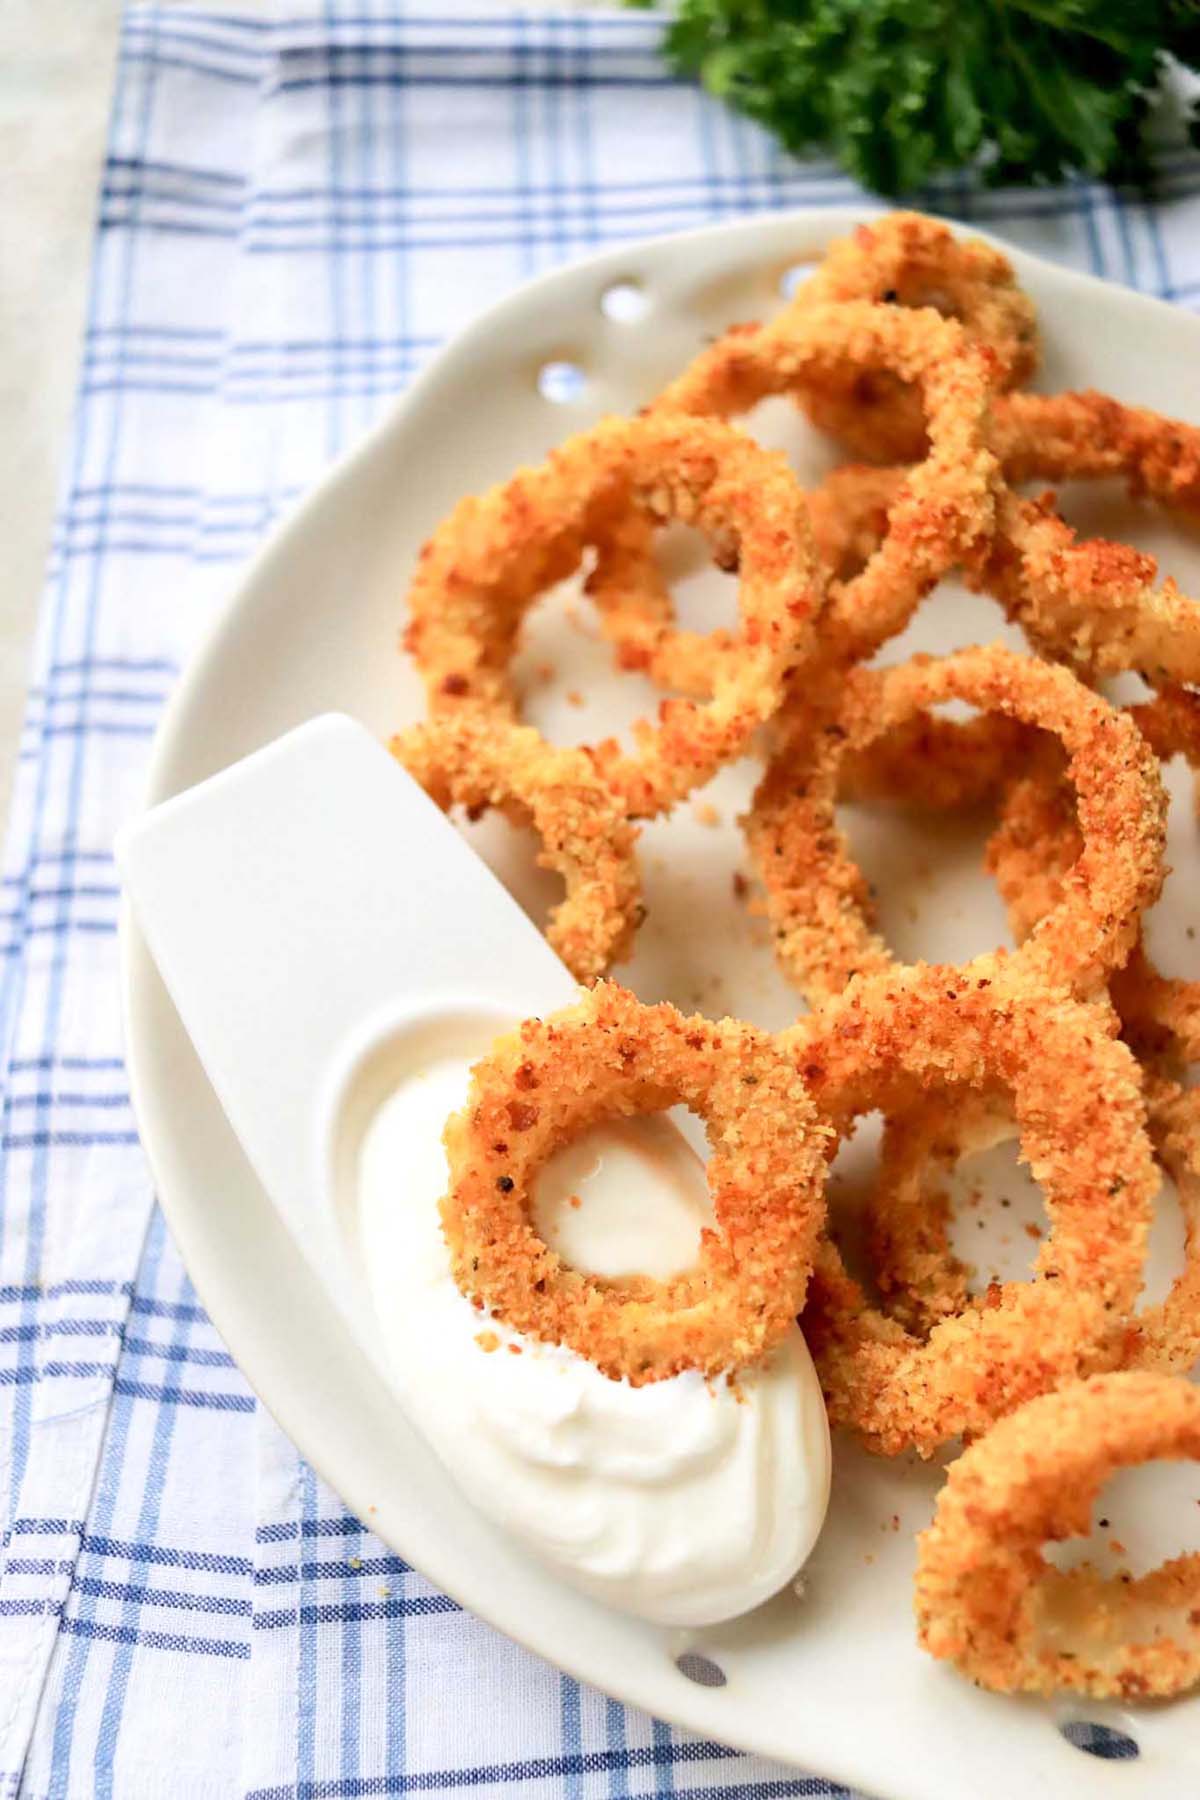
I'm a big fan of serving crispy onion rings with various dipping sauces for an appetizer no one can resist. Alternately, you can serve your onion rings on the side of burgers, hot sandwiches, hot dogs, wings, and just about anything else.
More delicious appetizers/side dishes to try: Air Fryer Corn Fritters
Ingredients You Need

- Large onion: Sliced into ¼ inch thick slices. You can make homemade onion rings with yellow or white onion, keeping in mind white onion has a more intense oniony flavor. Sweet onions are also an option. Try with vidalia onions.
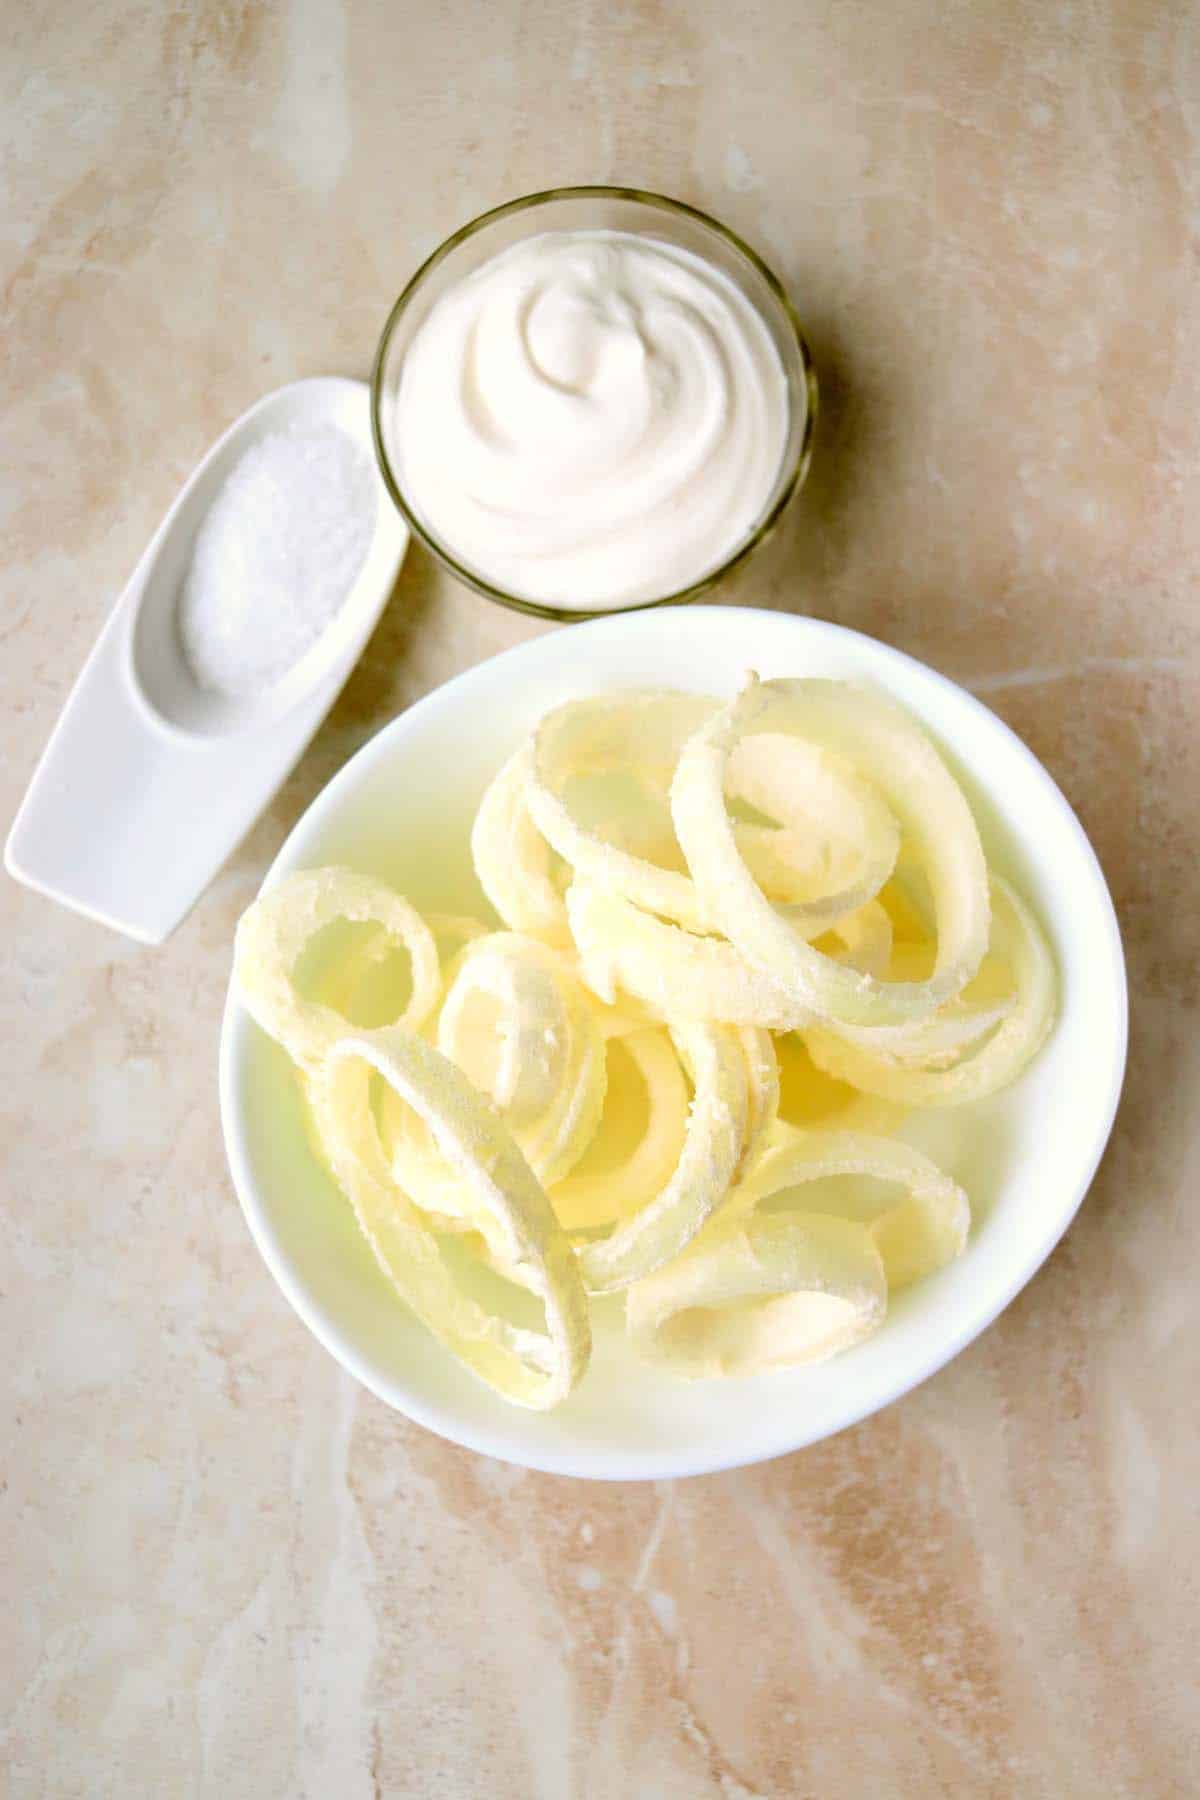
- All-purpose flour: Onion slices are first dredged in flour, giving the wet onion ring batter (nonfat yogurt) something to cling to.
- Plain yogurt: Helps make a thick, extra crunchy onion ring breading and adds a subtle tangy flavor. You can use regular, low-fat, or nonfat yogurt. Plain Greek yogurt works as well.
- Regular breadcrumbs: The final layer of the breading. You can use plain breadcrumbs or Italian breadcrumbs. You can also use panko breadcrumbs, but the texture of the breading will be different. If using Italian breadcrumbs, skip the added salt.
- Salt: Enhances the flavors.
Step By Step Photos
Dredge onion slices in flour.
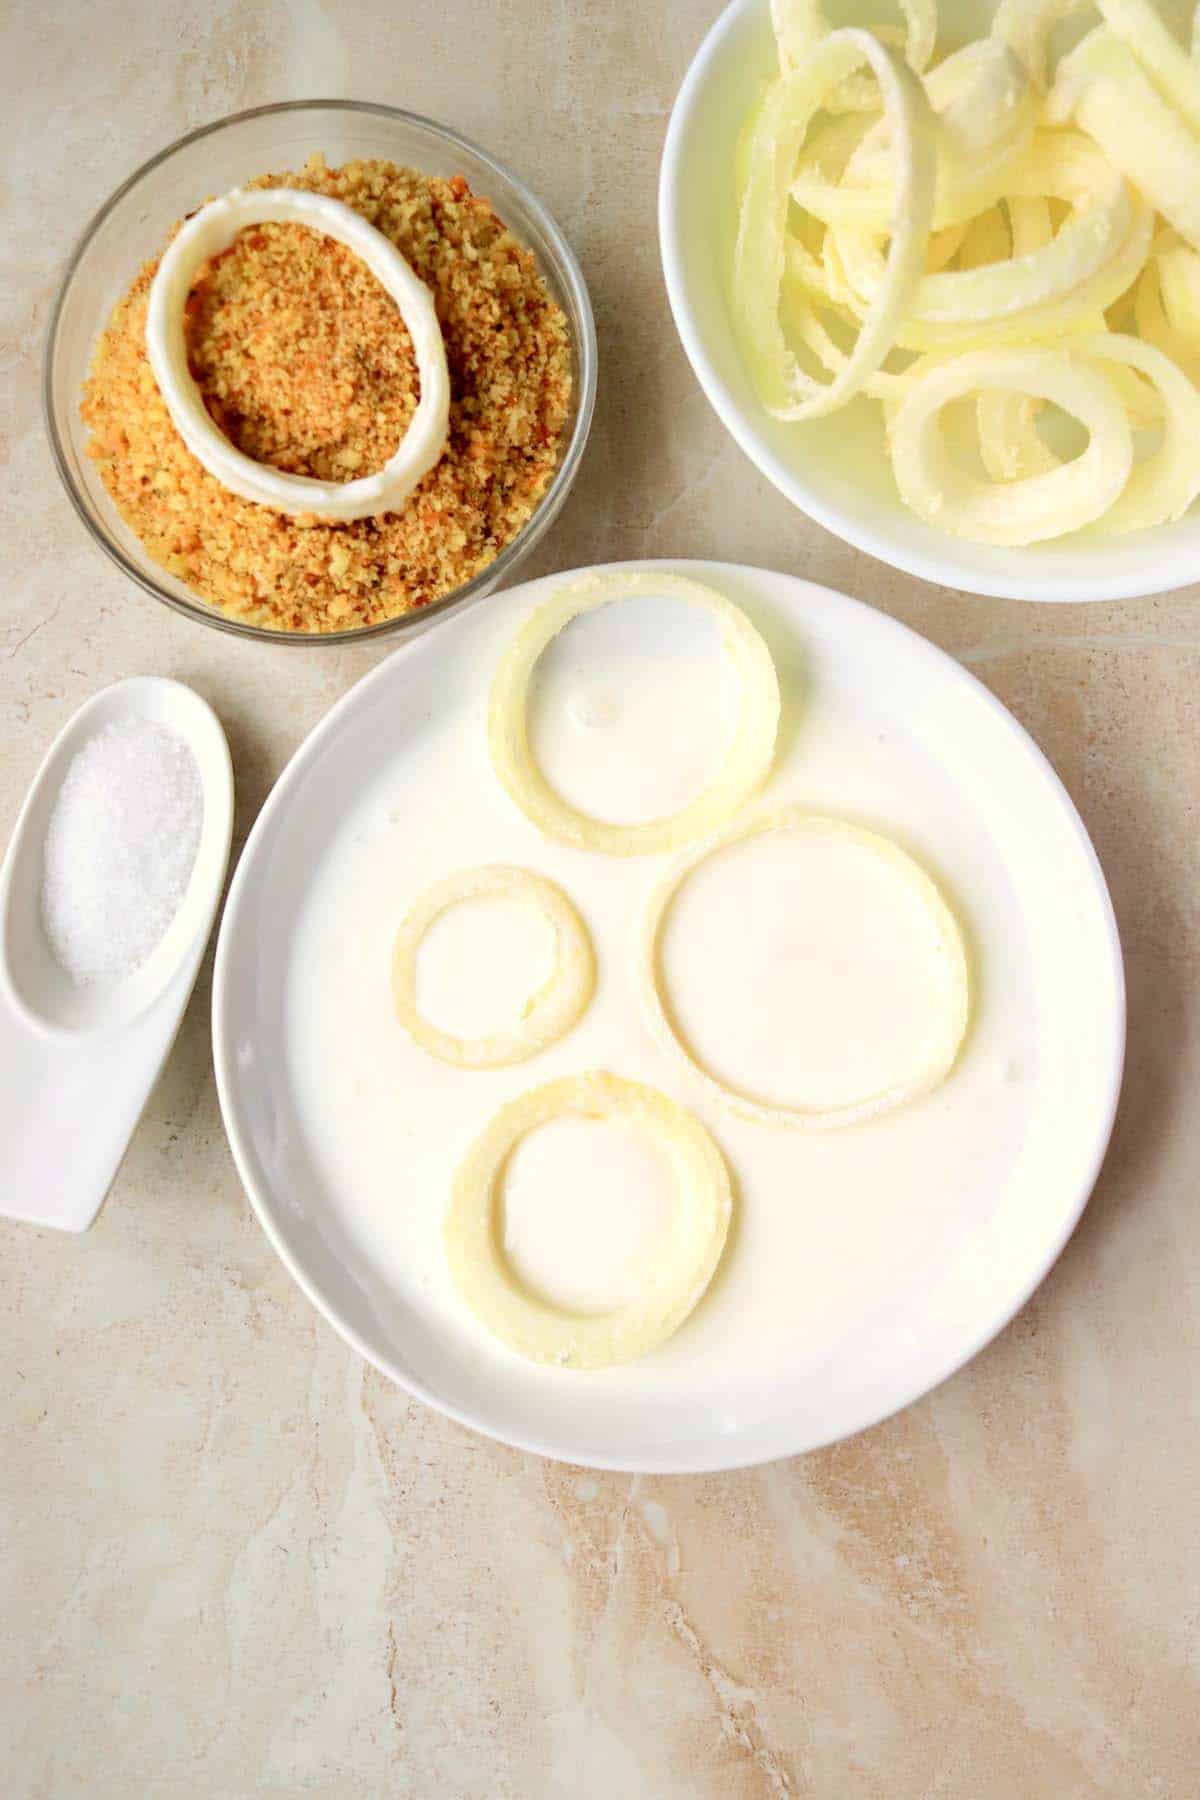
Dip them in yogurt and press them into breadcrumbs.
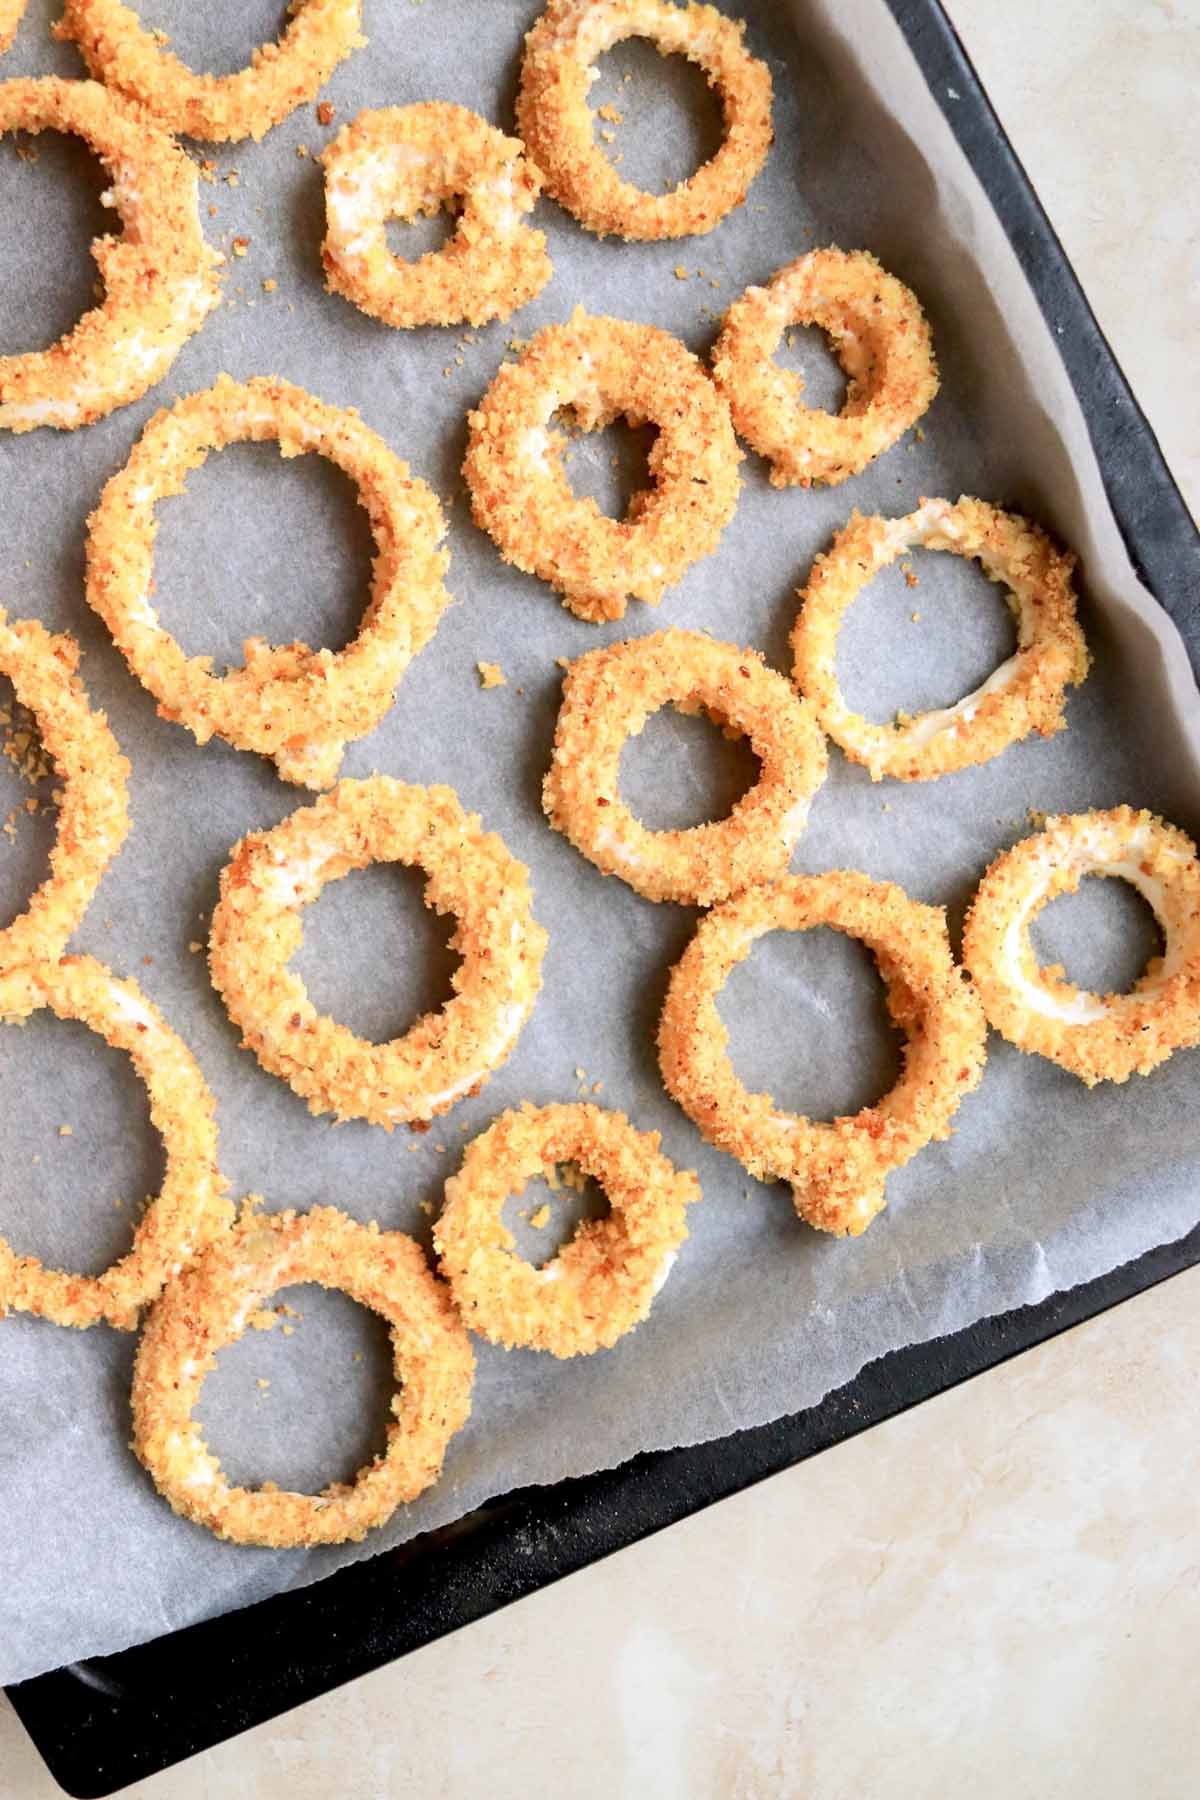
Place breaded onion slices in a single layer.
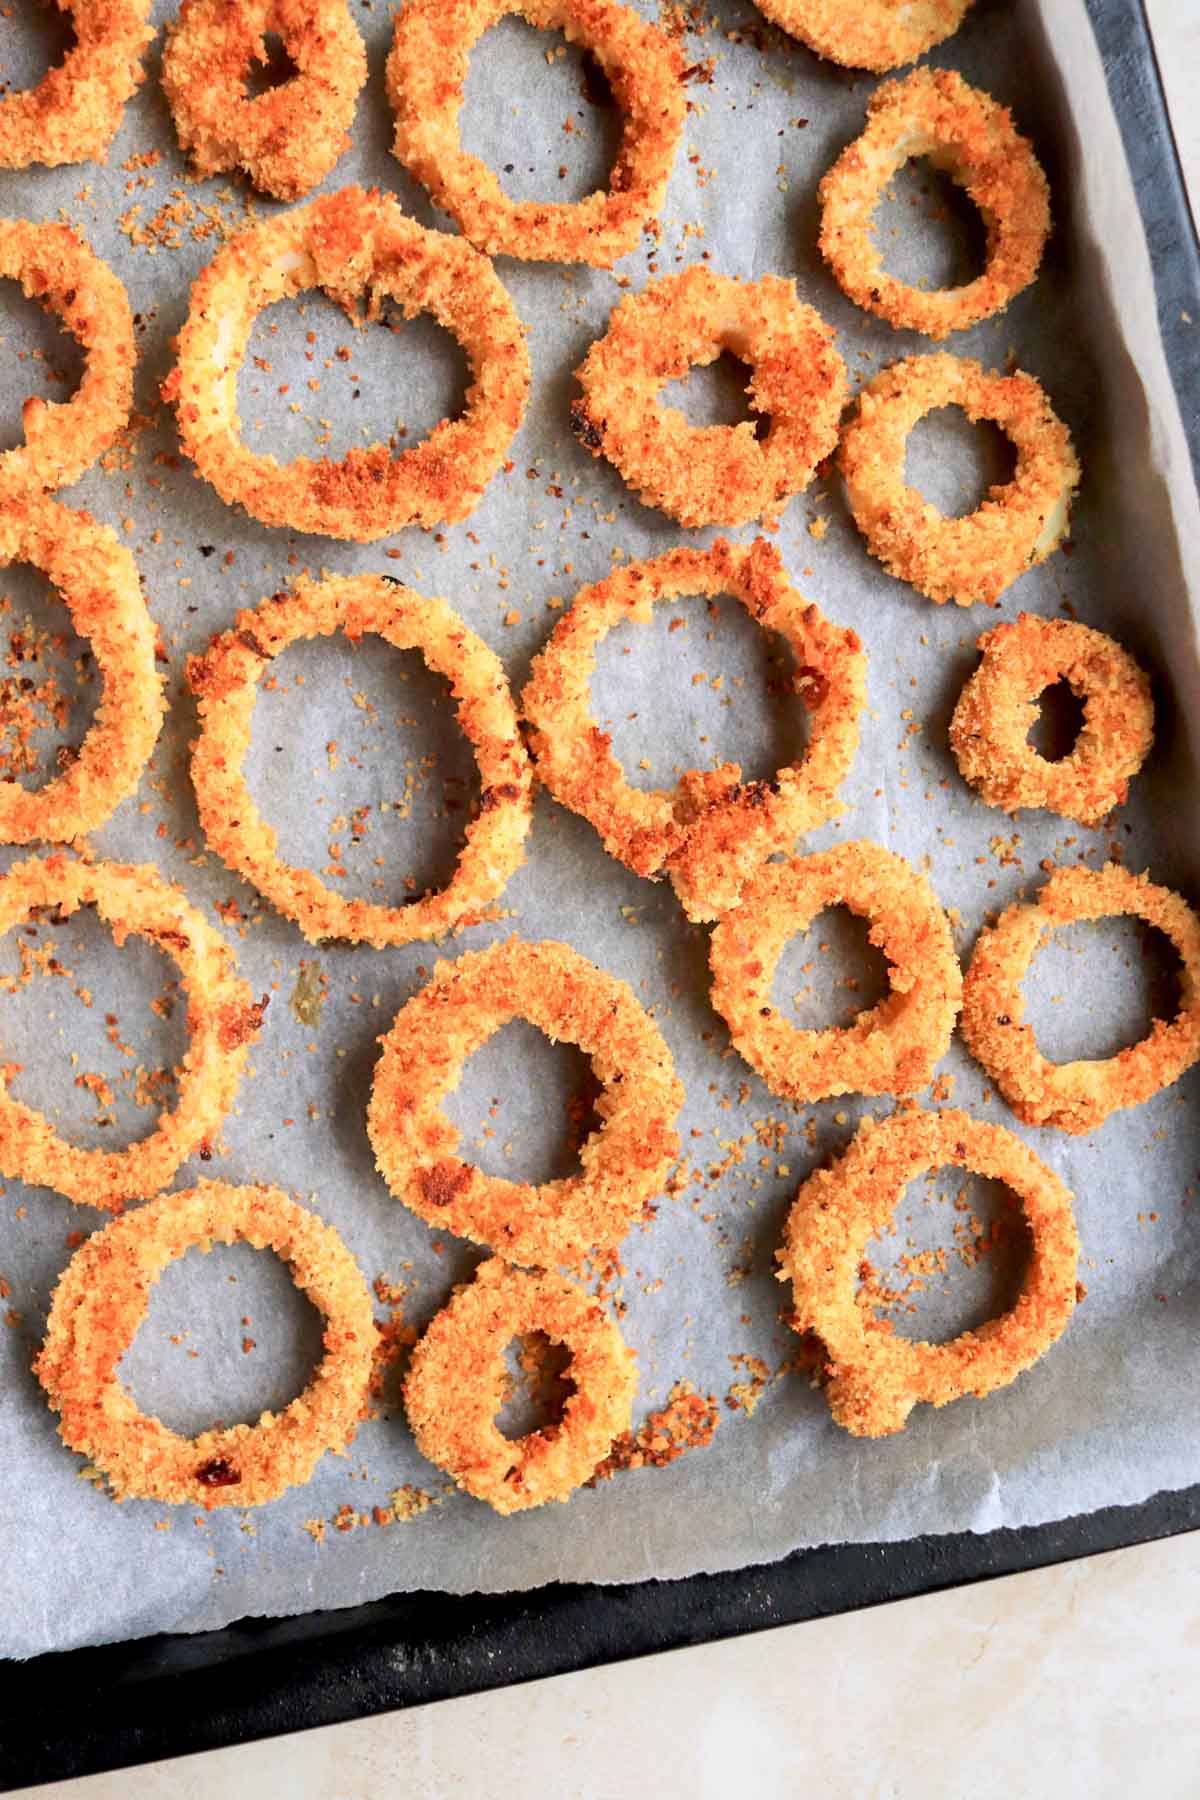
Bake!
More low calorie appetizers to try: Air Fryer Bacon Wrapped Brussels Sprouts
How To Make Crispy Baked Onion Rings
Step 1. Prepare for baking: Preheat the oven to 350 ℉ and spray a large baking sheet with nonstick cooking spray or parchment paper. Set aside.
Step 2. Prepare the dredging station: You'll need three shallow bowls. Add flour to the first bowl, yogurt to the second, and breadcrumbs to the third.
Step 3. Batter onion rings: First, dredge onion slices in flour, shaking off excess. Then, dip them into the yogurt and press them into the breadcrumbs, coating them evenly. As you work through the batch, place the breaded onion slices on the prepared baking sheet in a single layer.
Step 4. Bake, then broil: Sprinkle with salt, then bake until the onions are tender-crisp (15-20 minutes). Next, set the oven to broil and continue cooking until the breading is golden brown and crispy (2-3 more minutes for the best results).
NOTE: You can print the FULL recipe with all ingredients & detailed instructions below!
More low-calorie appetizers you'll love: Low Calorie Fried Pickles
Tips
- Cutting onions into rings: Trim the stem and root and remove the peel. Then, trim a very thin slice on one side, creating a flat surface to keep the onion from rolling as you slice. Next, cut crosswise into ¼" thick rounds with the cut side facing down.
- If you're using a strong onion like white onion, you can soak the slices in cool water for 15 minutes to ease the intense, raw oniony taste. You can also put onions in a buttermilk soak to mellow out the flavor.
- Place onion rings on a wire rack set on top of a baking sheet. This lets the heat come in direct contact with both sides, giving you an even golden crisp on the top and bottom.
- Feel free to add some spices to the flour mixture. Some of my favorites are garlic powder, onion powder, cayenne pepper, chili powder, black pepper and creole seasoning.
Frequently Asked Questions About Healthy Baked Onion Rings
No, but this is an excellent trick for getting the breading to stay in place. First, place the breaded onion rings on a cooling rack, then place the rack in the fridge for about 30 minutes (this gives each layer of breading time to firm up and cling to the onion slice).
Place the cooled onion rings in a zip top bag, press out as much air as possible, and keep refrigerated for 2-3 days. To reheat leftovers, place them on a baking sheet and back under the broil until the breading crisps back up.
Cool completely, then place onion rings on a baking sheet and set the baking sheet in the freezer until the onion rings are frozen. Keep the frozen rings in a freezer-safe zip top bag and freeze for up to 3 months. Reheat directly from frozen for 10-15 minutes.
More Recipes With Onion You Might Enjoy
Healthy Onion Rings
Special Equipment
Ingredients
- large yellow onion sliced into ¼-inch slices
- ½ cup all-purpose flour
- ½ cup plain nonfat yogurt
- ½ cup breadcrumbs (plain or Italian)
- ¼ teaspoon salt (skip if using Italian breadcrumbs)
Instructions
- Preheat the oven to 350°F and spray a baking sheet with nonstick cooking spray. Set aside.
- You'll need three shallow bowls. Add flour to the first bowl, yogurt to the second, and breadcrumbs to the third.
- First, dredge onion slices in flour, shaking off excess. Then, dip them into the yogurt and press them into the breadcrumbs, coating them evenly. As you work through the batch, place the breaded onion slices on the prepared baking sheet.
- Sprinkle with salt (if using), then bake until the onions are tender-crisp (15-20 minutes). Next, set the oven to broil and continue cooking until the breading is golden and crispy (2-3 more minutes).
Notes
- Cutting onions into rings: Trim the stem and root and remove the peel. Then, trim a very thin slice on one side, creating a flat surface to keep the onion from rolling as you slice. Next, cut crosswise into ¼" thick rounds with the cut side facing down.
- If you're using a strong onion like white onion, you can soak the slices in cool water for 15 minutes to ease the intense, raw oniony taste. You can also put onions in a buttermilk soak to mellow out the flavor.
- Place onion rings on a wire rack set on top of a baking sheet. This lets the heat come in direct contact with both sides, giving you an even golden crisp on the top and bottom.
- Feel free to add some spices to the flour mixture. Some of my favorites are garlic powder, onion powder, cayenne pepper, chili powder, black pepper and creole seasoning.
- Storing: Let cool, place onion rings in a zip-top bag, press out as much air as possible, and keep refrigerated for 2-3 days. To reheat leftovers, place them on a baking sheet and back under the broil until the breading crisps back up.
- Freezing: Cool completely, then place onion rings on a baking sheet and set the baking sheet in the freezer until the onion rings are frozen. Keep the frozen rings in a freezer-safe zip-top bag and freeze for up to 3 months. Reheat directly from frozen for 10-15 minutes.
Nutrition
All nutritional information is based on third-party calculations and should be considered estimates. Actual nutritional content will vary with brands used, measuring methods, portion sizes and more.
Bianca
This recipe is impossible. Greek yogurt is too thick to get an even coating on an onion ring which makes it impossible to get the batter to stick. Flour won't stick on the onion which makes it worse.
Kate
Sorry to hear you had trouble! If your Greek yogurt is too thick, dilute it with just a teaspoon or two of water to make a smooth dip. Every brand has different thickness and sometimes the whey separates out, making for an extra-thick Greek yogurt. Flour should stick to the wet parts of the onion. You can also quickly dip the onion in water, use a paper towel to pat dry (it'll still be a bit wet) and then dredge in flour.
Lee
Had a leftover single onion so I made these today, DELICIOUS but addictive! Added 1/8 Chipolte powder for a "mild kick"! Will definitely make these again. Will try with Arrowroot to replace AP Flour for gluten free. Thanks!
serena
I can't wait to try this! I love onion rings, just not all the grease.
Vicky
I love that I can still enjoy onion rings even when I am trying to eat healthy. They are one of my favorite sides, but typically are so greasy. Love your variation!
Sara Welch
Onion rings are always a hit in my house and this was no exception!! So delicious and crispy; and healthier than the deep fried version!
Michele
We love onion rings at our house, and I'm so excited to see a healthy version. Will definitely be giving this a try this weekend.