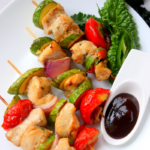
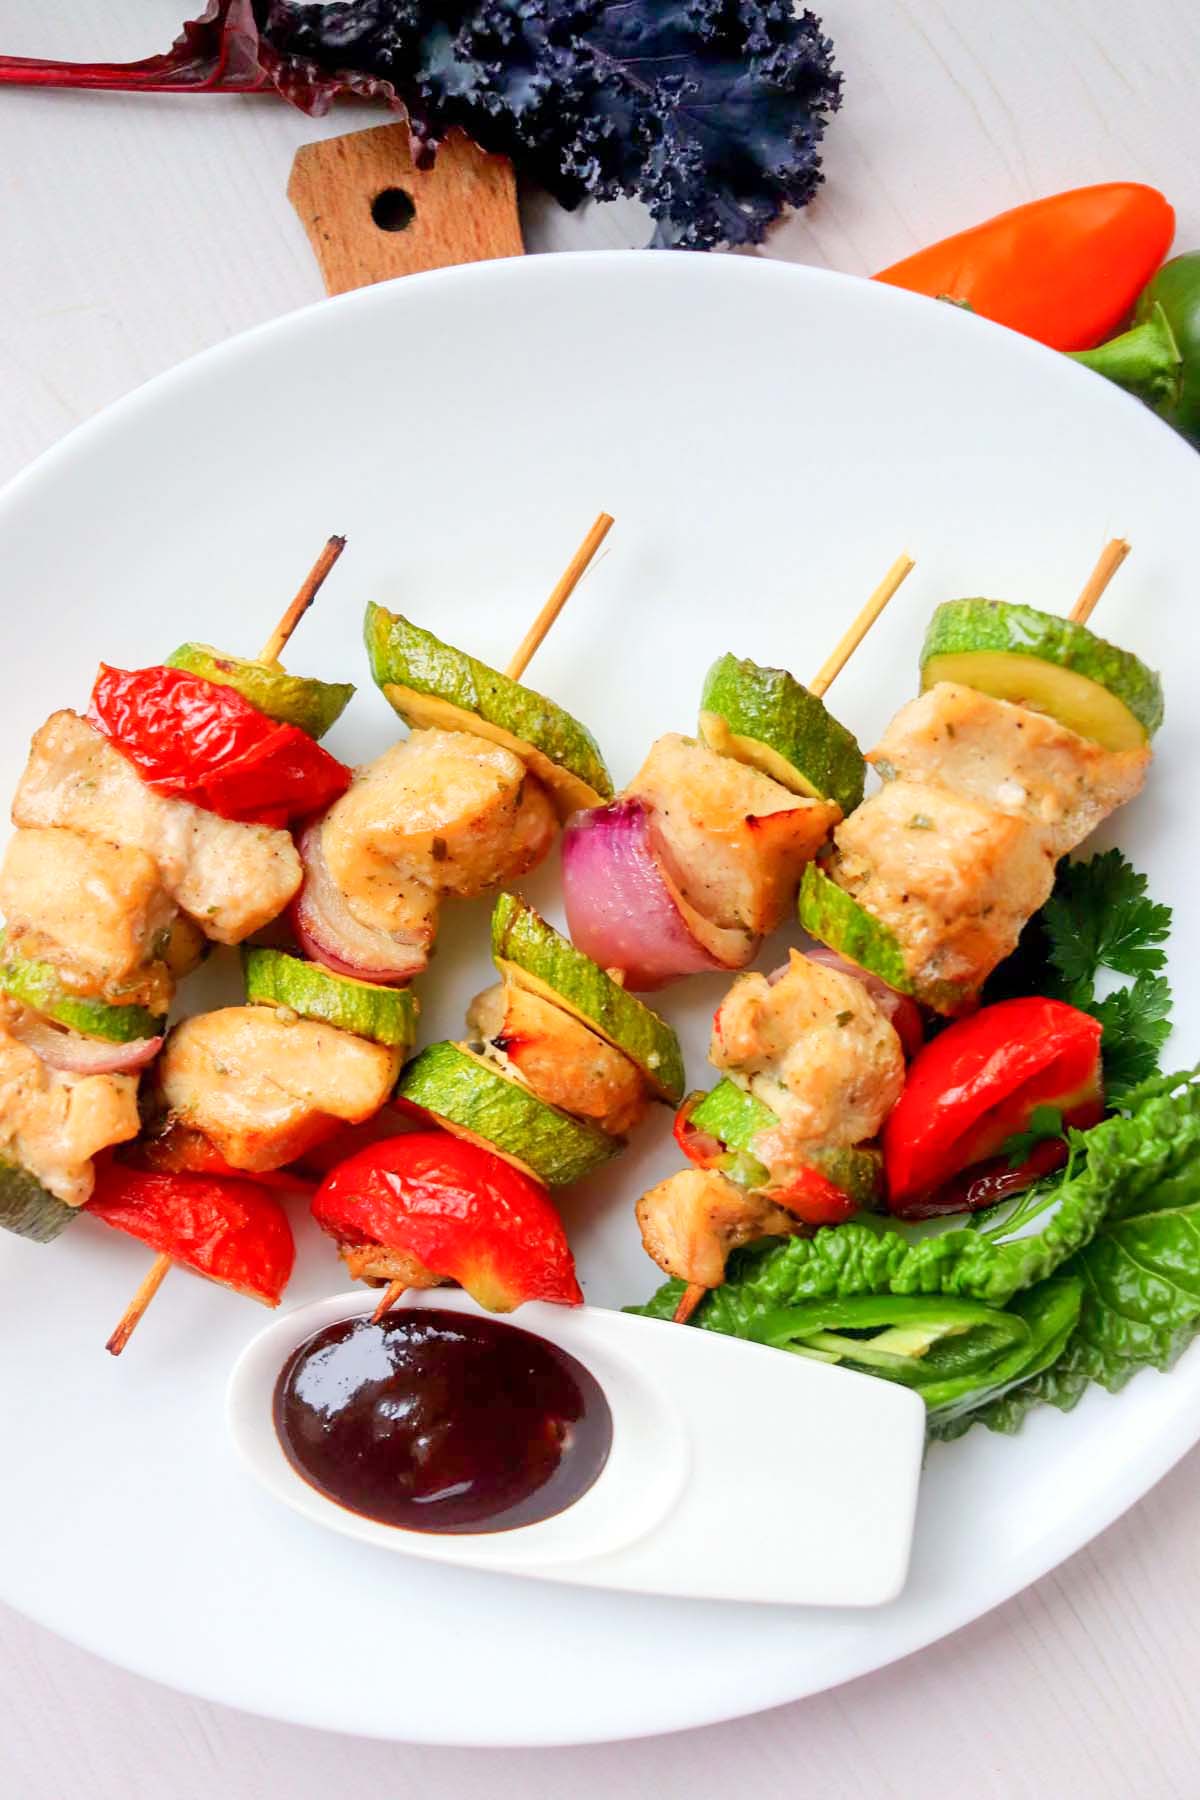
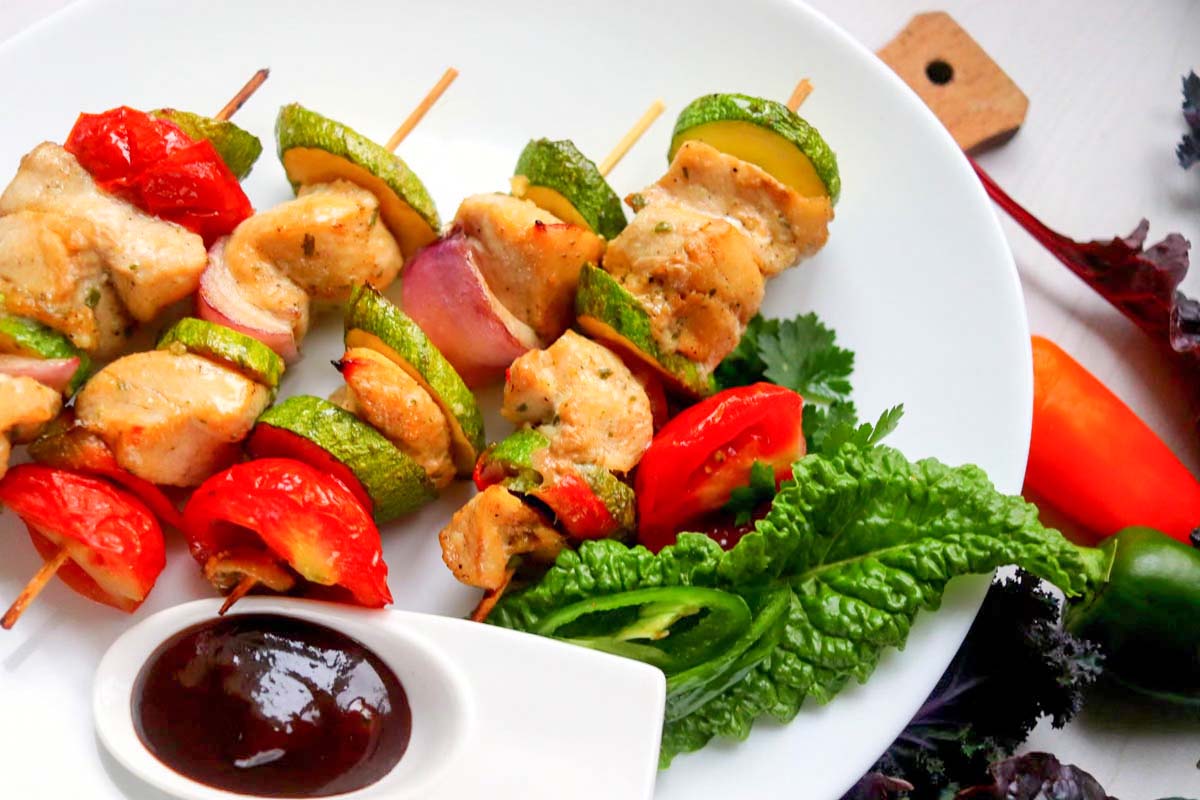
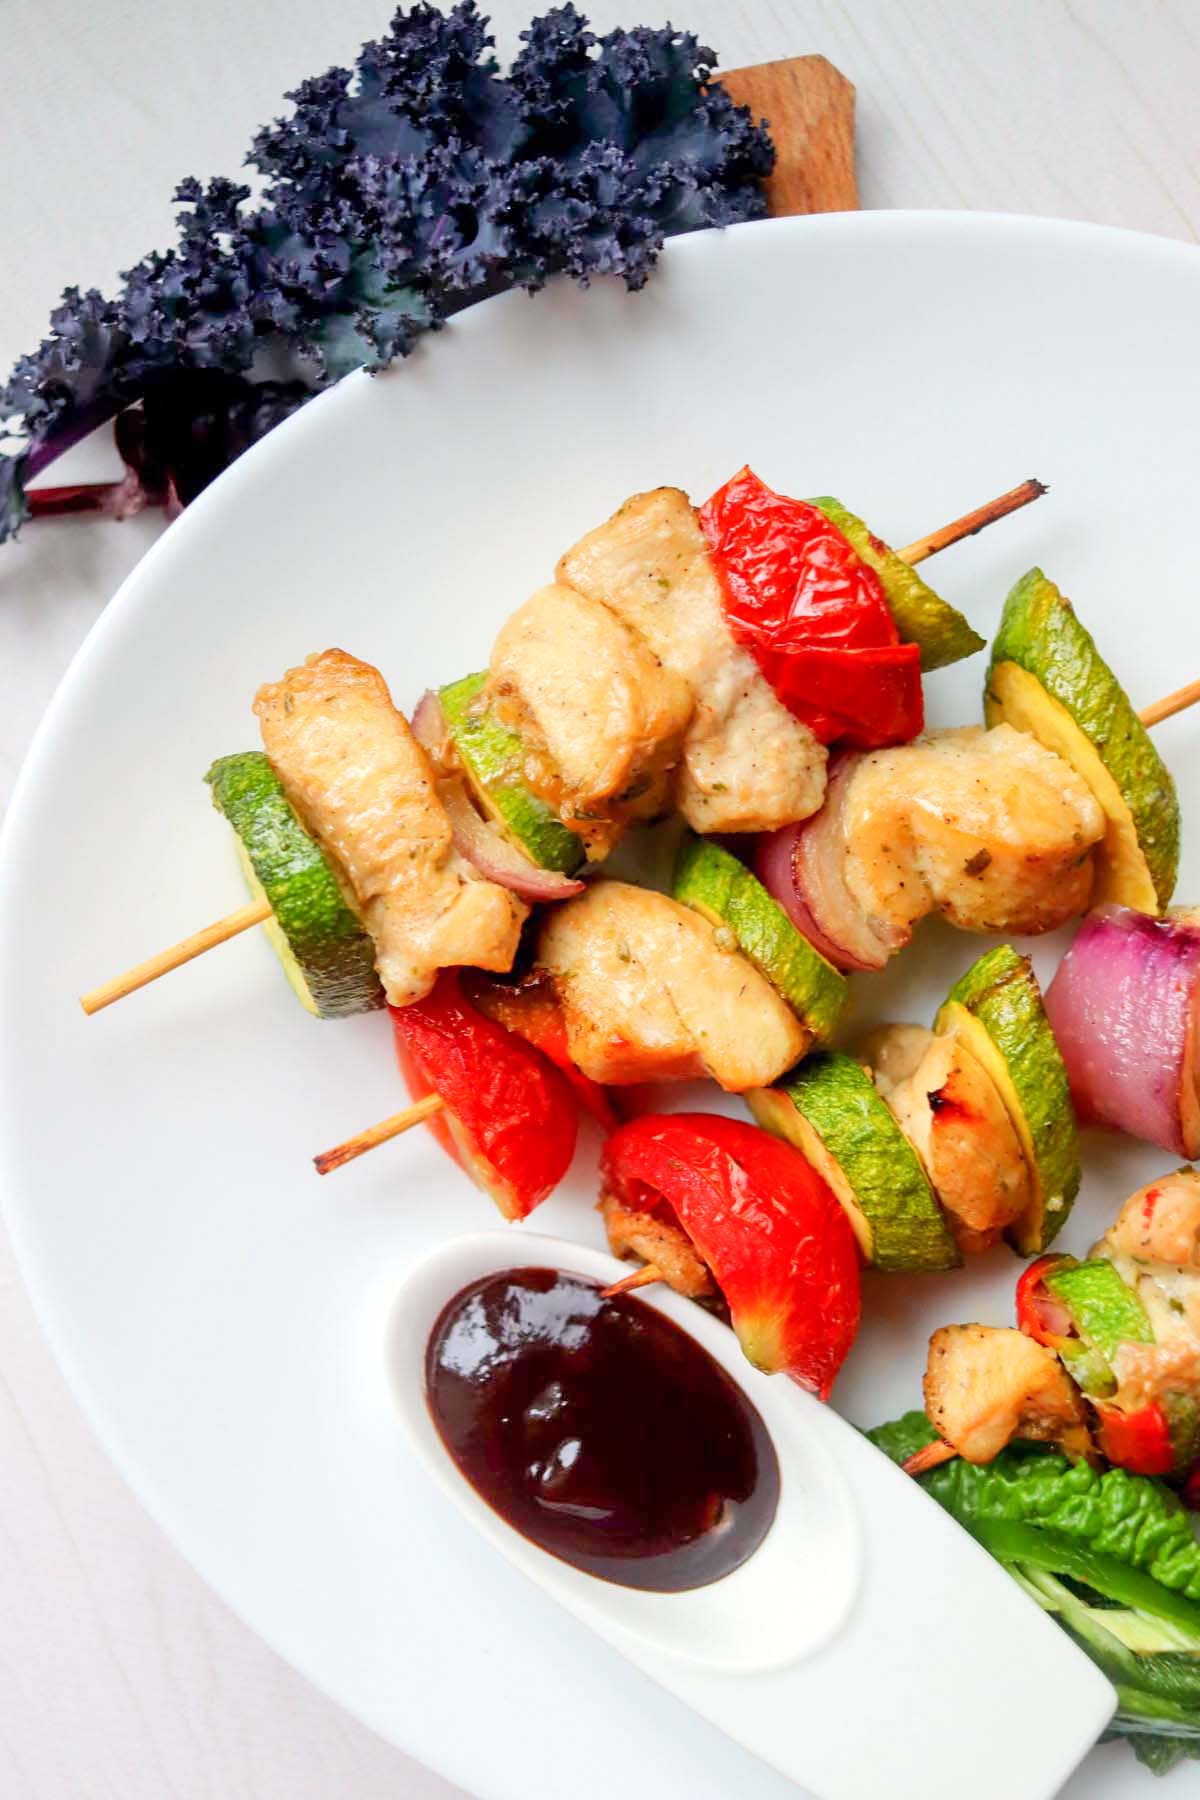
Broiled Chicken Kabobs are a quick and easy way to make chicken skewers indoors and all year long. Flavorful marinated pieces of chicken breast and tender crisp vegetables skewered and then cooked to perfection under a hot broiler.
Try my Oven Baked Teriyaki Chicken Thighs and my Broiled Chicken Wings for more oven chicken recipes!
Jump to:
- Chicken Kabobs
- Broiling vs. Grilling
- Why You’ll Love This Recipe
- Ingredients You Need
- Step By Step Photos
- How To Make Juicy Chicken Kabobs
- Tips
- What To Serve with Broiled Chicken Kebabs
- Frequently Asked Questions About This Chicken Kabob Recipe
- More Chicken Recipes You Might Enjoy
- Broiled Chicken Kabobs
- #respond
Chicken Kabobs
With summertime well on its way, it's time to break out the bamboo skewers and make some broiled chicken kabobs. Tender chicken and colorful vegetables make the best flavorful kabobs!
While kabobs are certainly synonymous with summertime grilling, they can also be made in the oven. Oven chicken kabobs is a great way to achieve charbroiled flavor and flavorful chicken kabobs.
More easy chicken dinners: Cornflake Crusted Chicken Tenders
Broiling vs. Grilling
Let's first discuss how broiling compares to grilling. Both methods use direct heat and a similar cooking process. The primary difference is the source of the heat. When grilling, the heat source is below the food and when broiling the heat source is above the food. During both methods, food is turned to cook all sides evenly.
That said, broiling is different from roasting and baking in that the food is rotated during the process, exposing one side at a time to the high heat.
More easy chicken dinners: Air Fryer Half Chicken
Why You’ll Love This Recipe
This is the perfect summertime recipe, but since we're making these in the oven there's no need to stand over the grill during bad weather.
The simple marinade is jam packed with flavor. It's the best marinade for this chicken kabobs recipe. There's only a handful of basic, simple ingredients the entire family will love. Plus, easy clean up is a bonus!
More light and healthy baked chicken dinners: Sheet Pan Chicken Breast with Potatoes
Ingredients You Need
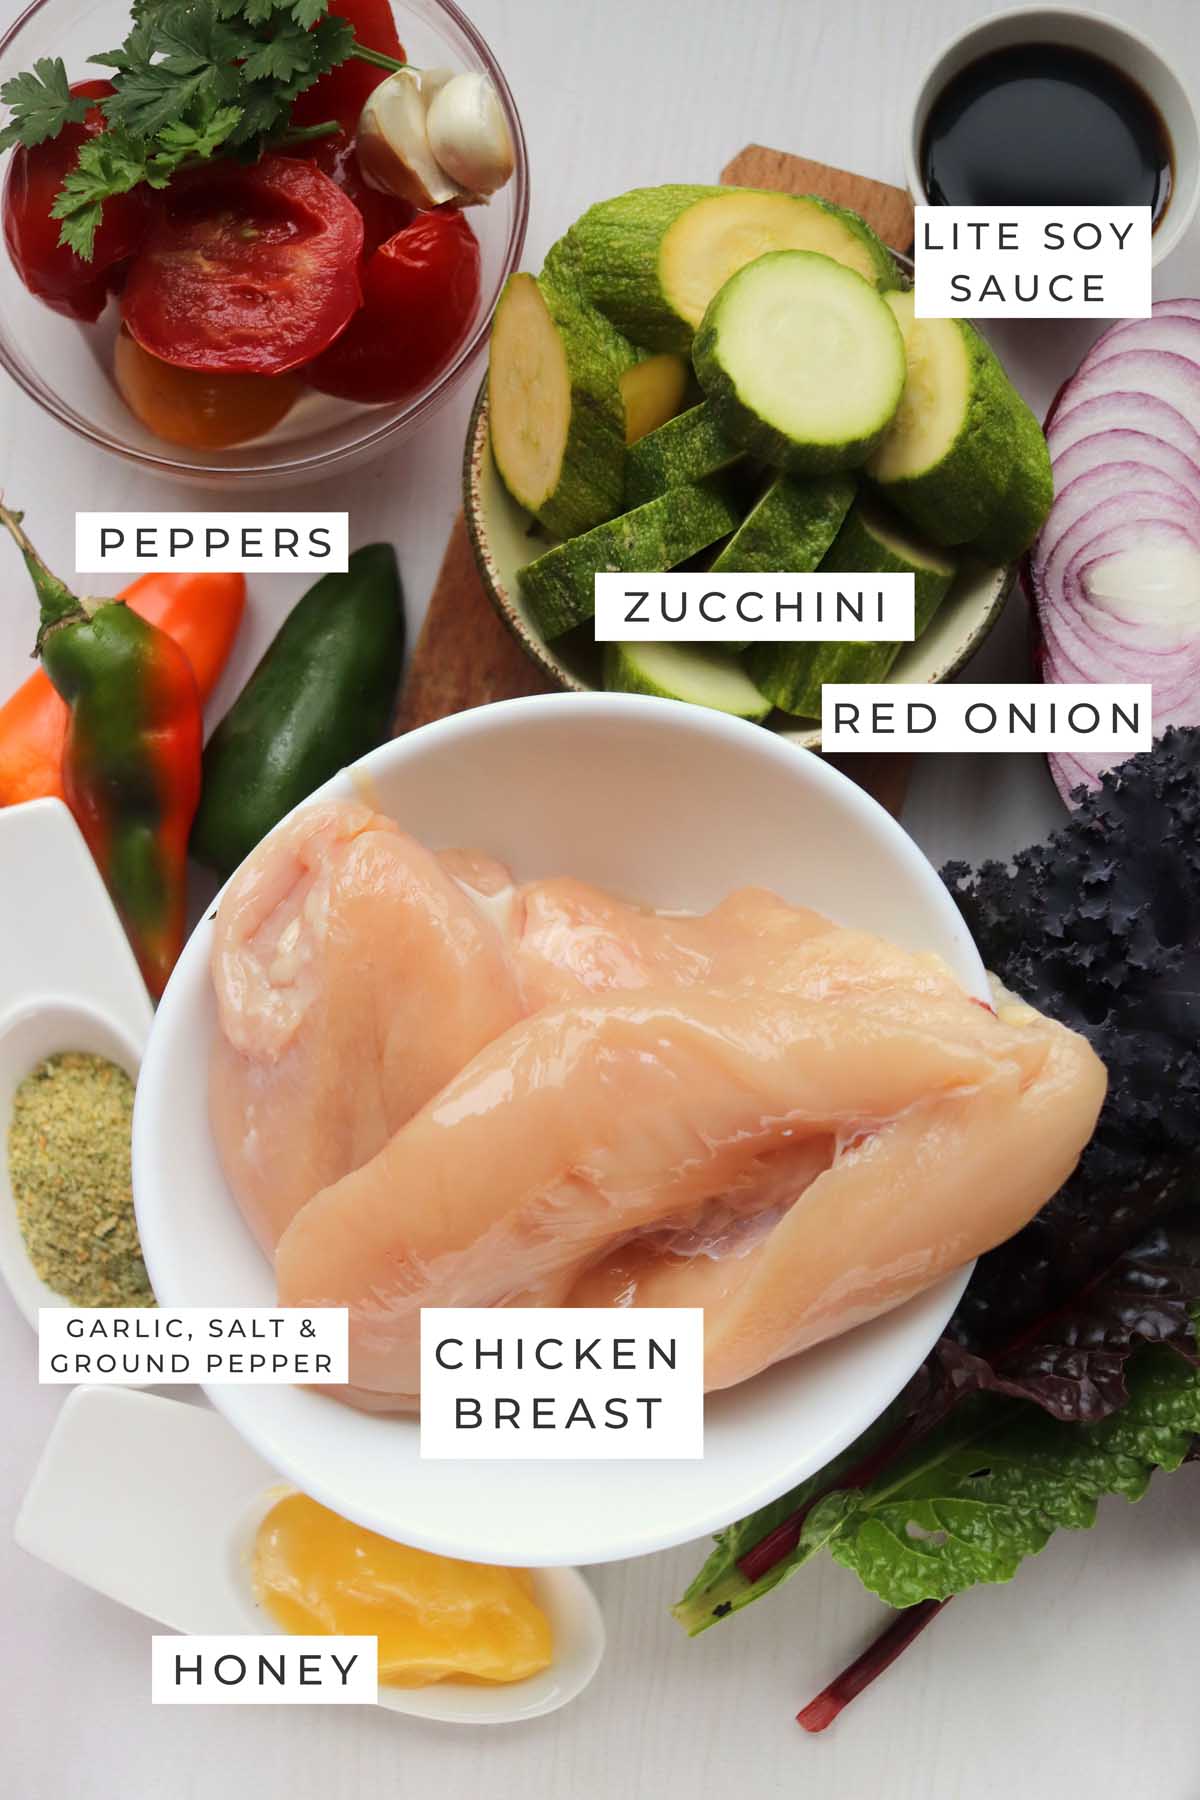
- Olive oil: The base of the marinade and helps achieve lightly charred edges. You can also use vegetable oil.
- Lite soy sauce: Adds savory, umami flavor to the marinade. Lite soy sauce is slightly lighter in flavor than "regular" soy sauce. But if you don't want to get a new bottle just for this recipe, you can use regular or low-sodium soy sauce—whatever you have on hand.
- Honey: Adds a subtle sweetness to the marinade. The natural sugars also help tenderize the chicken.
- Minced garlic: Flavors the marinade.
- Salt & black pepper: Enhances the flavor of the whole dish.
- Boneless skinless chicken breasts: Cut into bite-size cubes of 1.5-2 inches.
- Zucchini: Should be firm and vibrant green. I try to find larger zucchinis for grilling/broiling because their thicker skins hold up to the high heat.
- Red onion: Adds another layer of veggies to the skewers, with a nice crunch and flavor.
You'll also need small 6-inch bamboo skewers (soak them in water before using) or metal skewers. You'll place the chicken skewers on a large baking sheet or cookie sheet. Do NOT use parchment paper when using the broiler because the broiling temperature is higher than parchment paper can withstand, and it will turn brown and burn. You can use aluminum foil if you want easier cleanup.
More healthy recipes: Light and Heathy Meal Ideas
Step By Step Photos
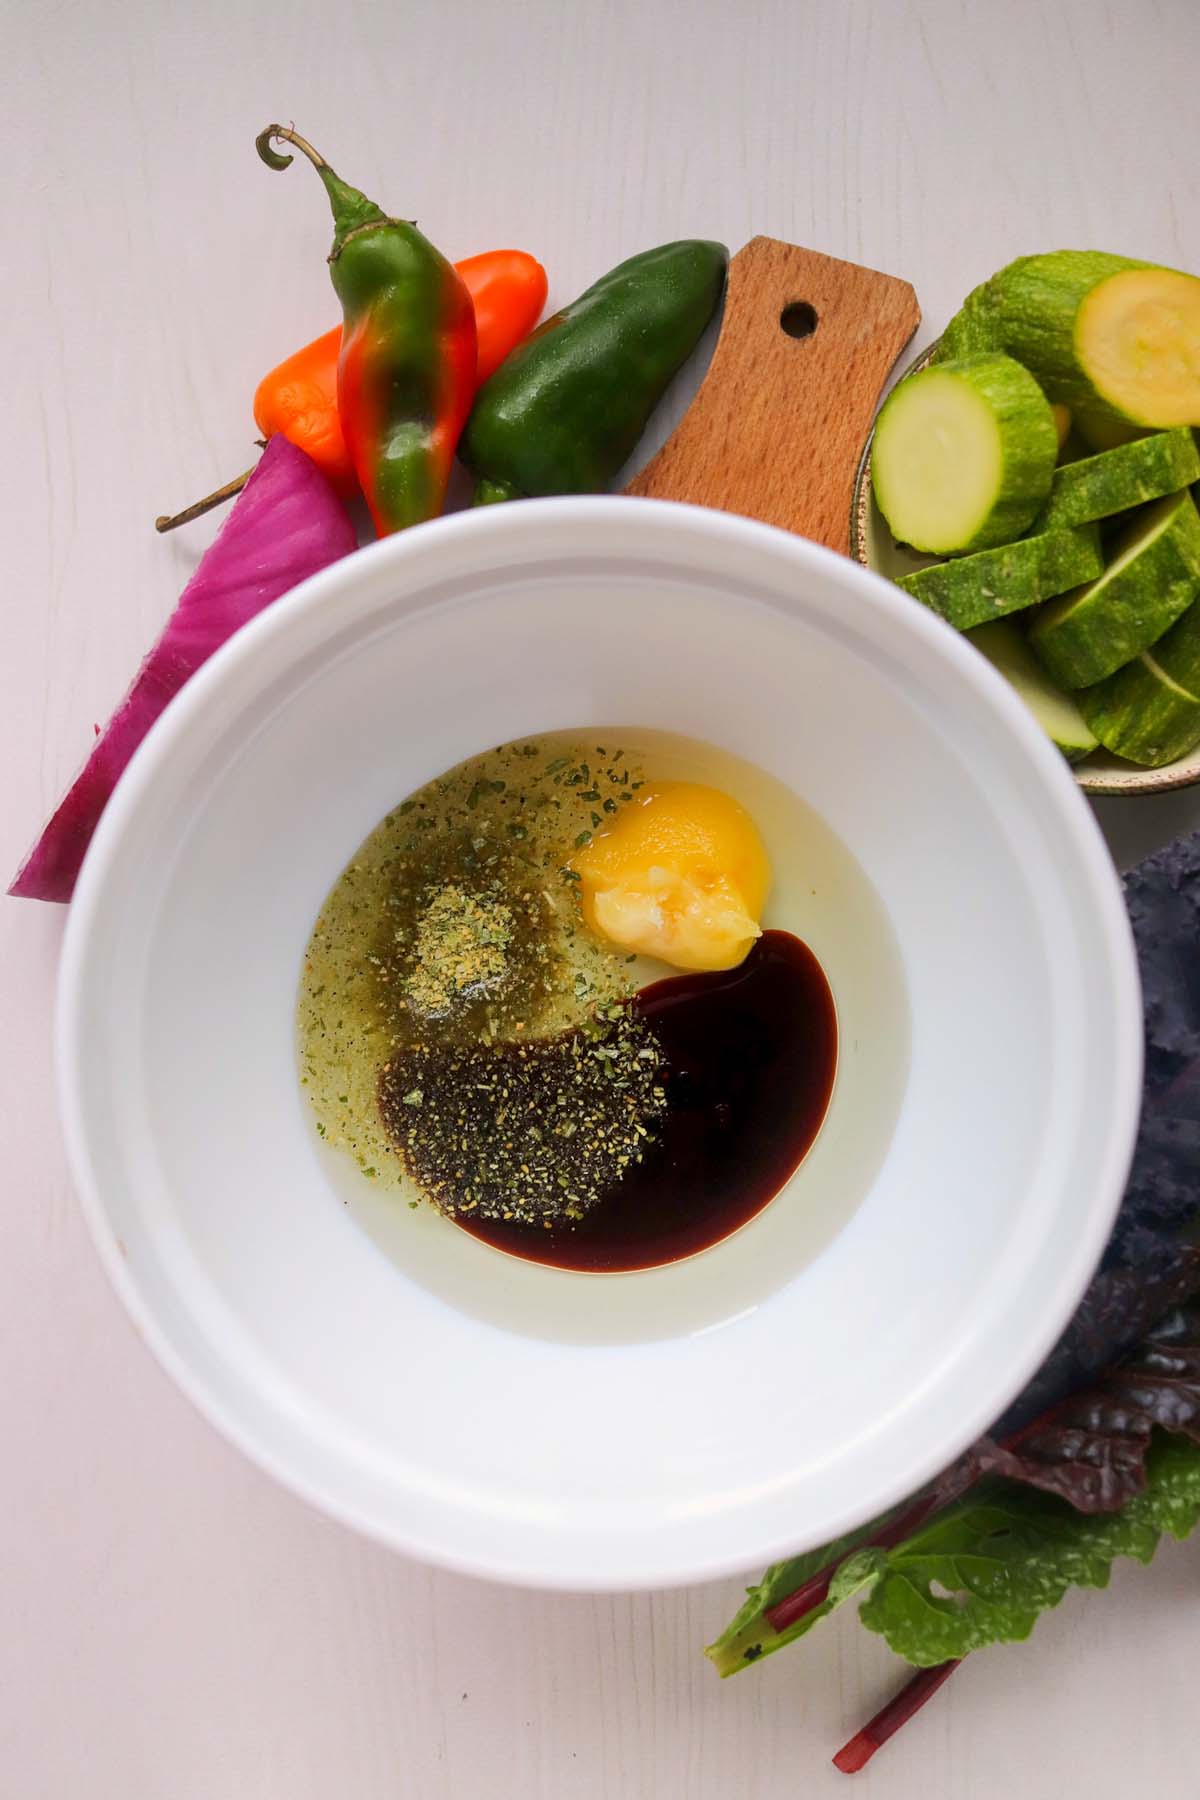
Mix together marinade ingredients.
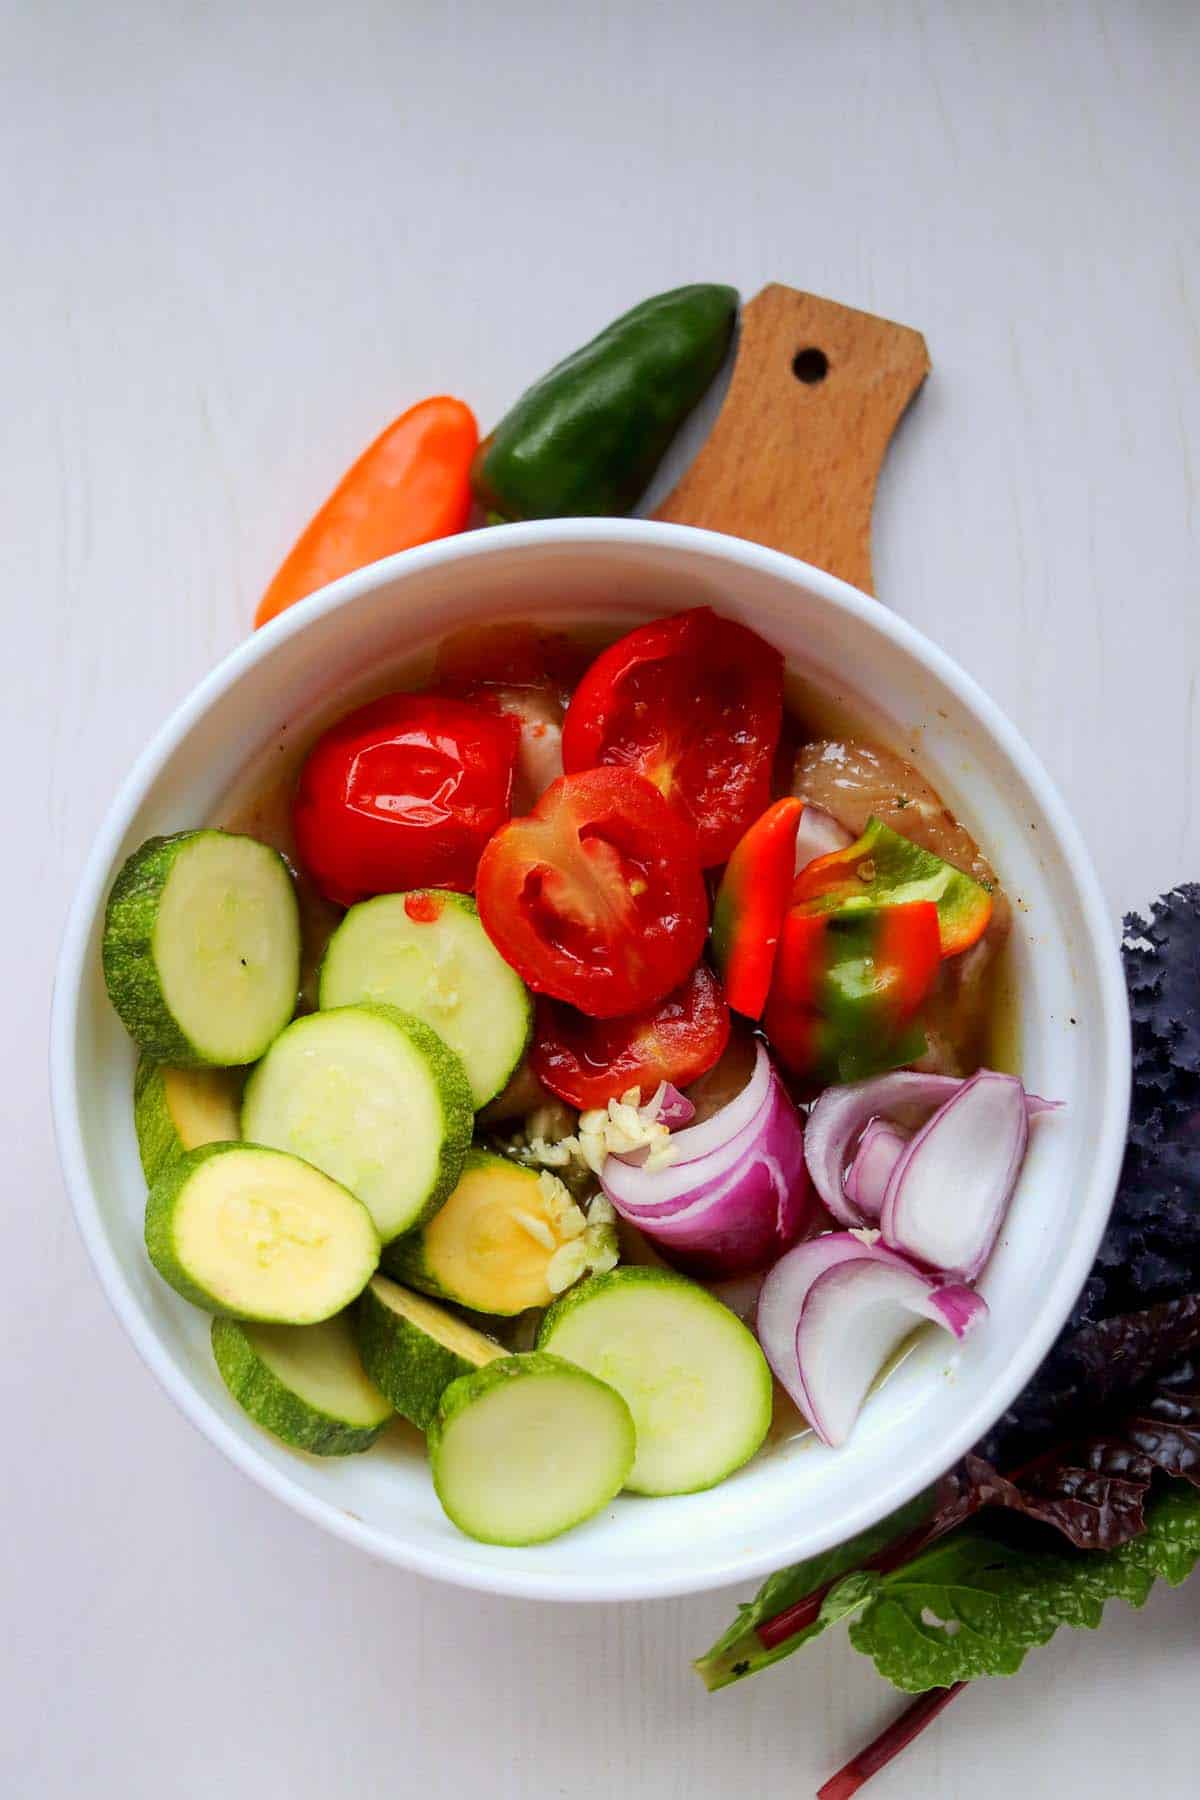
Marinate vegetables. Soak the bamboo skewers in water during this time.
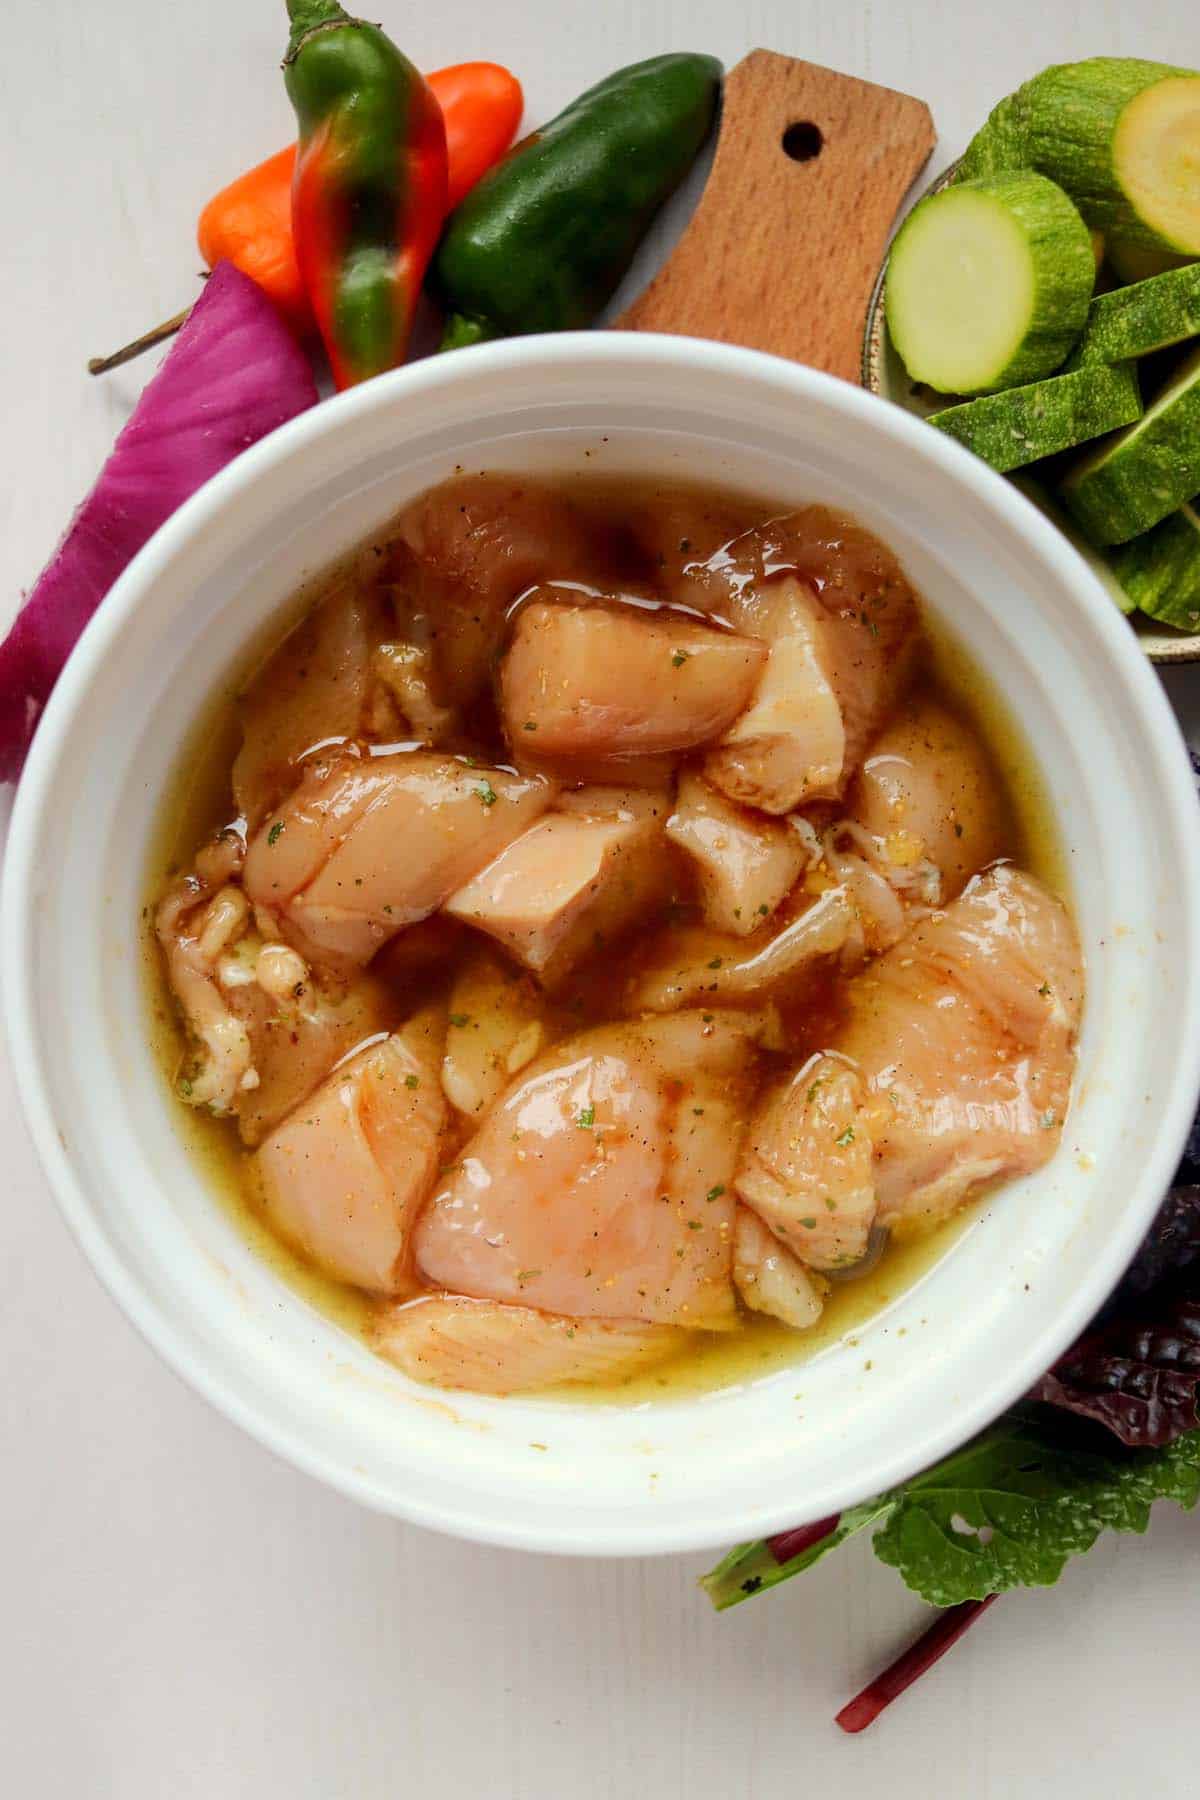
Marinate chicken.
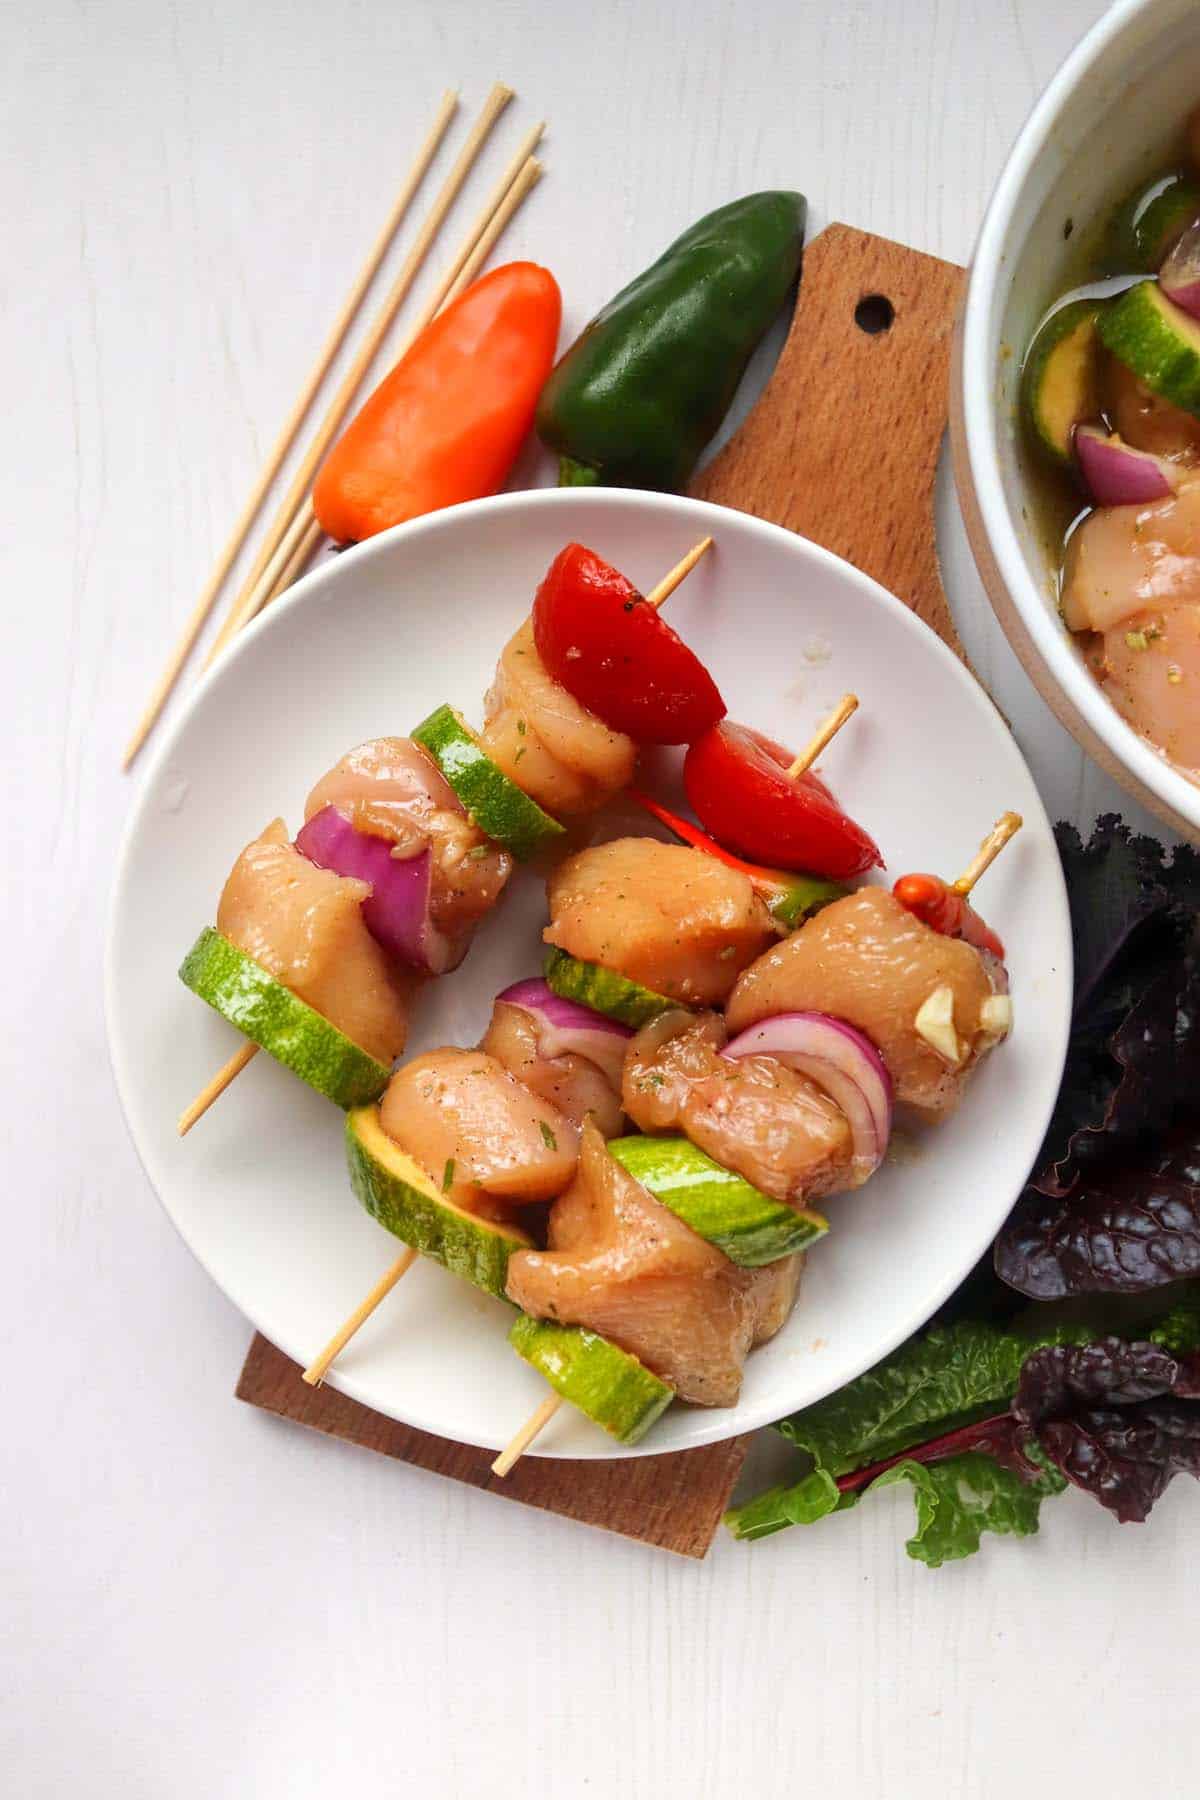
Skewer the chicken and vegetables.
How To Make Juicy Chicken Kabobs
Step 1. Prepare marinade: In a bowl, combine olive oil, lite soy sauce, honey, minced garlic, salt, and black pepper. Mix well.
Step 2. Marinate chicken and vegetables: Add chicken breast pieces, as well as zucchini, red onion, and bell peppers to the marinade. Toss to coat.
Step 3. Marinate time: Cover the bowl or seal the bag and refrigerate for 30 to 60 minutes, or up to 8 hours.
Step 4. Prepare skewers: Soak wooden skewers in cold water for at least 30 minutes to prevent burning. Skewer the marinated chicken and veggies onto the soaked skewers.
Step 5. Preheat broiler: Preheat the broiler for 15-20 minutes.
Step 6. Arrange skewers: Line a rimmed baking sheet with aluminum foil. Arrange the kabob skewers in a single layer on the baking sheet.
Step 7. Broil: Place the baking sheet under the broiler and broil for 4 minutes. Carefully flip each kabob and continue broiling for another 5 minutes or until the chicken is cooked through, and veggies are lightly charred and tender.
Step 8. Check doneness: Use a meat thermometer to check the internal temperature of the chicken if needed. Remove from the oven and serve!
NOTE: You can print the FULL recipe with all ingredients & detailed instructions below!
Tips
- Don't skip soaking the wood skewers! Soaking them first prevents them from charring and turning black in the oven - OR go ahead and skip this entire step and just use metal skewers.
- Soak the skewers and marinate the meat and vegetables the night before, so the day off all you need to do is throw the kabobs in the oven.
- Extra marinated veggies? You can either skewer them up and make vegetable kabobs or toss them on a foil-lined baking sheet and plop them under the broil for about 10 minutes.
What To Serve with Broiled Chicken Kebabs
This kebab recipe has protein and vegetable all in one recipe, so you don't need to cook a separate vegetable if you don't want to. However, if you want extra veggies, a quick cucumber edamame salad is a great option. A low calorie broccoli salad is also a great vegetable side dish.
For a heartier pairing, try serving these kabobs with charro beans or whole wheat breadsticks. They would be great next to cilantro lime cauliflower rice or regular rice.
Frequently Asked Questions About This Chicken Kabob Recipe
Yes. Boneless, skinless chicken thighs will work just fine.
Make sure the broiled chicken kabobs have cooled completely and then store in an airtight container or bag for up to 3 days in the fridge.
Yes, however it's best to freeze the skewer before cooking. Freeze raw skewers on a baking sheet and then wrap each frozen skewer tightly in plastic wrap and store in a container in the freezer for up to a month. Thaw overnight in the refrigerator before broiling or grilling. Freezing these kabobs will change the texture of the veggies though, they'll be softer than using fresh veggies.
More Chicken Recipes You Might Enjoy


Broiled Chicken Kabobs
Special Equipment
- Aluminum Foil (optional)
- Bamboo Skewers or use metal skewers
Ingredients
- ¼ cup olive oil
- ⅓ cup lite soy sauce (or use regular or low-sodium soy sauce)
- ¼ cup honey
- 1 teaspoon minced garlic
- ½ teaspoon salt
- ¼ teaspoon black pepper
- 1 ½ pounds boneless, skinless chicken breasts cut into 1-inch pieces
- 1 large zucchini cut into ½-inch pieces
- ½ red onion cut into ½-inch pieces
- 1 green bell pepper cut into ½-inch pieces
- 1 red bell pepper cut into ½-inch pieces
- 1 yellow bell pepper cut into ½-inch pieces
Instructions
- Place the olive oil, light soy sauce, minced garlic, and salt/pepper in a large bowl or resealable baggie. Stir the marinade ingredients well to combine.
- Add the chicken pieces and vegetables to the marinade. Toss well to coat.
- Cover the bowl (or seal the bag) and marinate in the refrigerator for 30 to 60 minutes, or as long as 8 hours.
- Meanwhile, soak wooden skewers in cold water for at least 30 minutes to prevent burning.
- Turn the broiler on and preheat for 15-20 minutes.
- While waiting for the oven to get nice and hot, skewer the chicken and veggies.
- Next, prepare a rimmed baking sheet by lining it with aluminum foil. Arrange the kabob skewers in a single layer.
- Place baking sheet under broil and broil for 4 minutes. Carefully flip each kabob over and continue broiling for another 5 minutes, or until chicken is cooked through and veggies are lightly charred and cooked tender. You can check the internal temperature of the chicken with a meat thermometer if you're not sure if it's cooked through.
Video
Notes
- Don't skip soaking the wood skewers! Soaking them first prevents them from charring and turning black in the oven - OR go ahead and skip this entire step and just use metal skewers.
- Don't use parchment paper because it can burn and catch on fire with the heat of the broiler.
- Soak the skewers and marinate the meat and vegetables the night before, so the day off all you need to do is throw the kabobs in the oven.
- Extra marinated veggies? You can either skewer them up and make vegetable kabobs or toss them on a foil-lined baking sheet and plop them under the broil for about 10 minutes.
- Storing: Make sure the broiled chicken kabobs have cooled completely and then store in an airtight container or bag for up to 3 days in the fridge.
- Freezing: It's best to freeze the skewer before cooking. Freeze raw skewers on a baking sheet and then wrap each frozen skewer tightly in plastic wrap and store in a container in the freezer for up to a month. Thaw overnight in the refrigerator before broiling or grilling.
Nutrition
All nutritional information is based on third-party calculations and should be considered estimates. Actual nutritional content will vary with brands used, measuring methods, portion sizes and more.


Laura
These are so easy to make. I love how they turn out slightly charred on the edges. It feels like cooking on the grill, even when it's too cold outside.
Beth
These look fabulous! Thankfully I live in AZ and can still run outside and grill so I won't have to wait till next summer to give these a try!
Jessica Formicola
This is our absolute favorite dinner recipe! We make it all the time! Thanks so much for sharing the recipe!
Marie
Love the looks of this recipe! It's actually perfect for winter when you can't get out and grill. Just let the broiler do the job. Pinning for later!
Andrea Metlika
I really like that I can make these in my oven. They look delicious.
Jen
I love how easy this is to make! Definitely a go to dinner when I don’t feel like cooking.
Ali Hanson
This looks like the perfect summer recipe. Summer zucchini are my absolute favorite! Nice work!!
Ramona
I love to eat well and have less calories is definitely a bonus. I will definitely make these super soon. Colourful and so delicious recipe. Thanks for sharing
Alisa Infanti
Nothing says summer like having a BBQ and I always like to do kebobs. They are super easy and look special. Your recipe looks amazing. I will have to give it a try at my next gathering.
simplylowcal
Thanks! I hope you like! I love kabobs too.
Playful Cooking
The chicken does look moist! How did it not get the char under the broil?
simplylowcal
It just didn't actually. It wasn't in the broiler for too long, so it was just enough to cook and not to char. 🙂